
Last updated: 16AUG2021 (see Changelog for details)
Update – Team Ruka has a new update for their firmware, which you can find here, complete with the image and instructions!
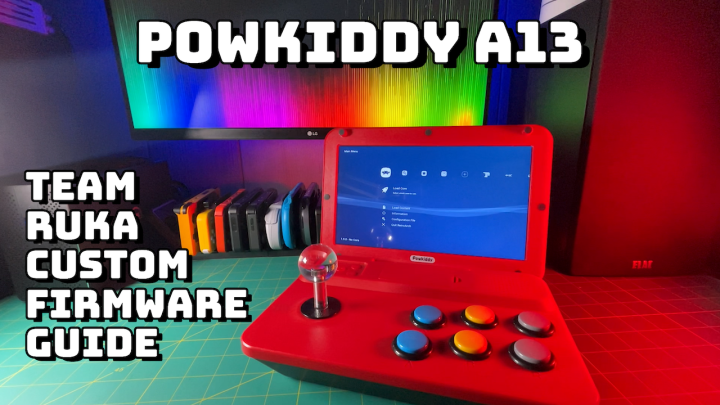
The PowKiddy A13 is an impressive little tabletop arcade device, especially after modding it with new hardware. In today’s guide I’ll show you how to install custom firmware onto the device to unlock updated emulators and a more customizable user interface.
If you haven’t bought one of these hidden gems yet, here is a link to grab one yourself.
Table of Contents
First things first
Prep your microSD card
Flash the custom firmware
Customization options

Changelog
First things first
This custom firmware is made possible by a team of developers known as “Team RuKa”. The name comes from a naughty pun in Spanish, which I will not translate because my kids might come to this webpage someday. This team is also involved in other development projects, such as the Neo Geo Mini, Arcade Stick Pro, and MVSX (HyloStick) team.
This custom firmware essentially installs the latest stable version of RetroArch (1.9.0) onto your device. Additionally, the install package comes with a custom RetroArch skin that looks very nice right out of the box. Giving you full access to RetroArch means that you can update cores (emulators) and tweak every little setting to your heart’s content.
One thing to keep in mind is that there are some caveats with this current custom firmware. First, HDMI out function is currently not supported, so if that is important to you, you might have to stick with the stock firmware. Additionally, there is currently no way to change the screen brightness, it is at 100% all the time (the screen is a bit dim as a whole, so I don’t mind this). And lastly, while this firmware will allow you to install your own RetroArch cores, performance is still limited to PS1 and below — no Dreamcast or N64 (although Dreamcast is in the works).
To download the custom firmware, you have to join the Team Ruka Telegram channel. If you haven’t used Telegram before, it is a secure messaging app available for most phones and tablets.
To install the firmware, you will need a USB-A to USB-A (male to male) cable, or an adapter. One USB-A end needs to plug into the computer, and the other into your PowKiddy A13.
Finally, one note about the firmware. This custom firmware is flashed on the device itself, and not an SD card. So your SD card is purely for storing your ROMs and emulators. If you try out the custom firmware and you don’t like it, there is a way to roll back to the original stock firmware. The stock firmware (and instructions) are available on the Team Ruke Telegram channel.
Prep your microSD card

Like most other retro devices from China, the PowKiddy A13 comes with a generic microSD card, which is often prone to failure. Your safest bet is to replace it with a microSD card from a well-known brand. I recommend you store that original card somewhere safe in case you run into any issues in the future, and buy a new SD card from a reputable brand like SanDisk or Samsung to use in your device.
In general, I recommend the cards listed below, in order or preference. The prices fluctuate all the time, so keep an eye out for deals. In general, I would expect to pay $20 for a 128GB card and $30 for a 256GB card. A 128GB card will allow you to load EVERY 8-bit and 16-bit game out there, all of the arcade games that work, and quite a few PS1 and Sega CD games (those systems have the largest file sizes). A 256GB card will allow you to store even more of those larger games.
128GB cards:
SanDisk Extreme
Samsung EVO Select
Samsung Pro Endurance (more reliable but pricey)
SanDisk Ultra

256GB cards:
Samsung EVO Select
SanDisk Ultra
To prep the card, you need to format it for the FAT32 file system. If you are using an SD card that is larger than 32GB, you need to use a free and simple program called guiformat. Simply install it and format your code. Note that the program is a little finicky — close all Windows Explorer windows before trying to format your card, or else you will get an error.
Next, you will want to add the RetroArch files to your newly-flashed SD card. To do so, head over to the Team Ruka Telegram channel and download the latest custom firmware. Unzip the package, and inside you will find a folder named “ruka-cfw-sdcard”. Most all of the contents within that folder onto your SD card: bios, roms, and settings folders, and a couple ReadMe files.
To update your emulators (RetroArch cores), head over to this Libretro repository. Go into the settings/retroarch/cores folder on your SD card, and replace any of the cores found on your card with more recent versions found in the repository. You might be tempted to download a Nintendo 64 core while you’re there; I’ve tested them, they don’t work on this device.
In order for arcade games to show up properly, you need to import them alongside a dat file that will correlate the correct game name with the zip file. I show you how to do this in the video above, but for now, just download this file (right-click on the “Download” button and select Save target as…) and save it inside the settings folder.
And lastly, add your ROM files to the “roms” folder on your SD card. Organize them into folders, and you can name them whatever you’d like. Your card is now ready for primetime, so let’s flash the firmware.
Flash the custom firmware
Please note that flashing this custom firmware is only possible on a Windows PC. So if you’re a Mac user, you will need to borrow a friend’s computer, or install a virtual machine.
Just in case you haven’t already, download the custom firmware package via the Team Ruka Telegram channel, and unzip it. Inside you’ll find another zipped folder named “Driver”. Unzip this folder, then run the .exe file to install the drivers. Just to be safe, I would recommend you reboot your device to make sure the drivers are working.
To install the firmware, you will need a USB-A to USB-A (male to male) cable, or an adapter. One USB-A end needs to plug into the computer, and the other into your PowKiddy A13 (the top USB port on the device). Make sure your A13 is powered off. On the device, hold down the VOLUME +, VOLUME -, SELECT, and MENU keys, then power on the device. You should hear the “USB device connected” chime on your computer. If not, try re-installing the drivers (and reboot your PC again).
Once you hear the chime, double-click on the “flash all versions.bat” file and follow the prompts. It should take a couple minutes, and then you’re good to go. Be sure to power off the device when you’re done flashing.
To test out the new firmware, simply plug in your new SD card and power on the PowKiddy A13.
Customization options
There are a lot of options available to you, and I would recommend you familiarize yourself with the Libretro Docs to understand how RetroArch works in general. It’s a powerful system, but not always intuitive.
To start, you’ll want to create manual playlists, which will access the ROMs that you loaded onto your card. Check out the video at the top of this guide for more information.
If you’d like, you can also add thumbnails to your playlists. I also detail this in the video above, and here is a link to the thumbnail archive hosted by Libretro (RetroArch).
When creating a custom fullscreen scaling option for your device, make sure it’s 1024×600. For more info, yep, you guessed it, watch the video.
Changelog
16AUG2021
– added link to new A13 CFW
25JAN2021
– added dat file
23JAN2021
– published guide

The Team Ruka channel doesn’t seem to exist anymore or at least not coming up with the link you provided. Thank you for putting this all together!! You have been a great resource!
LikeLike
I found the channel for Team Ruka here:
https://t.me/chikipum_A12_CFW
LikeLike
Hello my friend. I just purchase a powkiddy a13 and the sd card corrupted . I need really bad a factory image of the sd card with the games . Can you help me please?
LikeLike
Great, I was able to install the latest version (2.1) which has the brightness control feature. So far so good, but the fact that there is no safe shutdown is a real issue… I often get SD card corruption.
LikeLike
This is a great guide.
There is an update that fixes lot’s of things:
Ruka CFW Release 3.0 Alpha 1
This release includes the following changes:
HDMI is now working properly
RetroArch has been upgraded to v1.9.1
Brightness can be changed via hotkeys (FN + Vol Up/Down)
Shutdown SD corruption prevention
Some additional retroarch cores….
Release Notes
HDMI:
HDMI output has to be connected before starting the console due to different internal vs HDMI output resolutions. By default HDMI output is set to 720p.
Shutdown:
To properly shutdown the machine, exit RetroArch, wait until the display turns off (you’ll notice how it goes all black after a few seconds), and press the power button to totally cut off the power to the board (otherwise the battery will drain in a few hours).
LikeLike