
Last updated: 20MAY2021 (see Changelog for details)
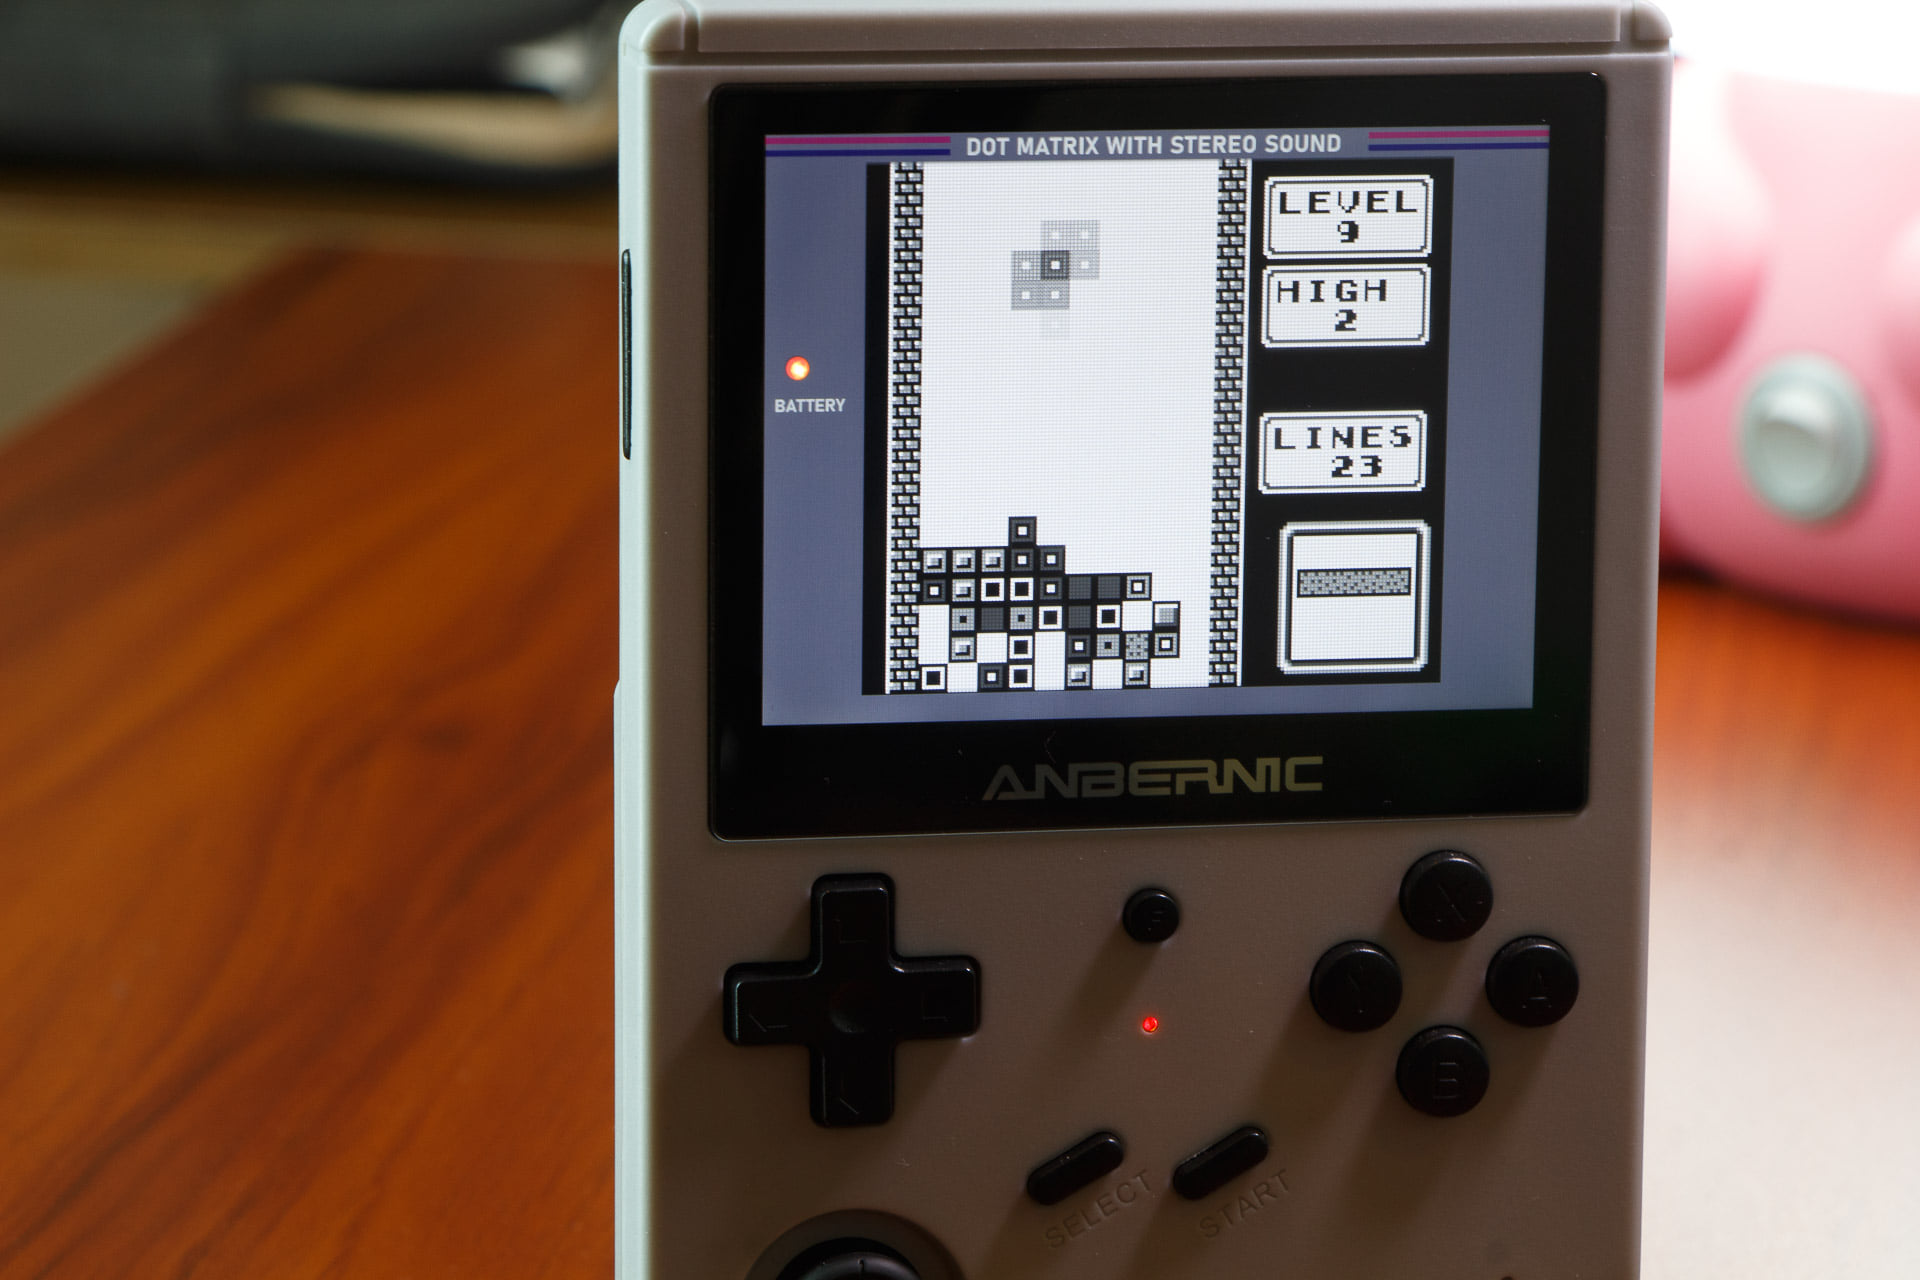
There is a lot of different options available to you when you play handheld systems like the Game Boy or Game Gear on the RG351P or RG351M. So in this guide I’ll walk you through how to set up overlays, shaders, colorization, and ghosting in order to accurately recreate those original handheld systems.
Note that these instructions are specifically for the ArkOS and 351ELEC custom firmwares. If you are using the stock firmware, you can generally just follow the ArkOS instructions, but I would recommend you check out my firmware comparison guide and make the switch to one of these.
Table of Contents
Download and install overlays
Turn on overlays
Combine overlays with LCD shaders
Add Game Boy colorization
Add Game Boy / Game Boy Color ghosting
Putting it all together
RG351V overlays

Changelog
Download and install overlays
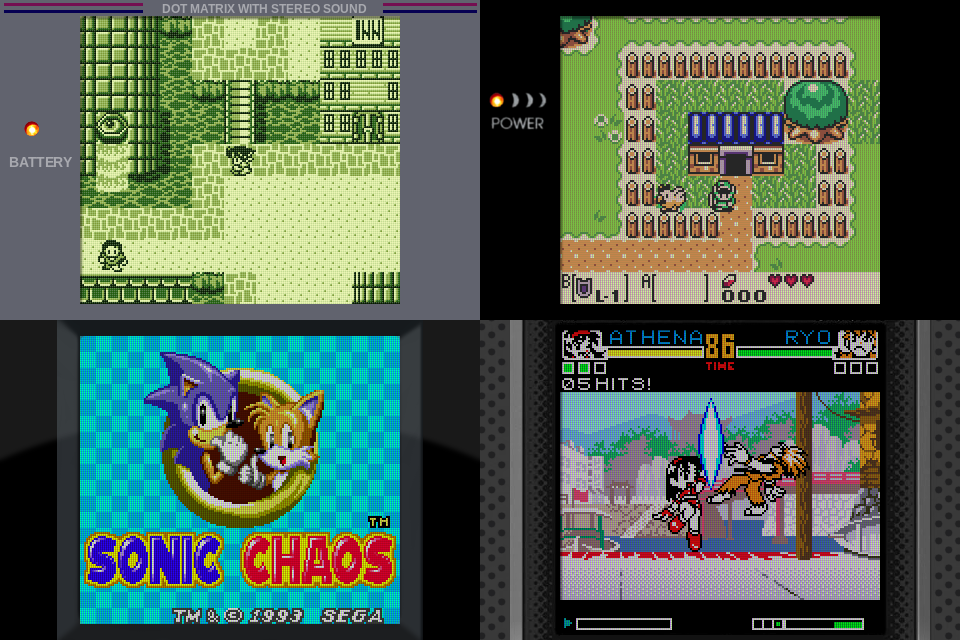
To get started, you will need to download this file which contains assets made by Reddit user Jdan-S and discord user ByEthanFox. This pack includes overlays for Game Boy, Game Boy Color, Game Gear, and Neo Geo Pocket (Color). Unzip the package and place your RG351 SD card into your computer via USB card reader.
In your SD card’s bios folder, create a folder named “bezels”, and add the overlay files (.cfg and .png files). If you are using 351ELEC, it will already have that folder.
For ArkOS, we’re going to make this our default overlay directory in RetroArch so that it’s easy to find.
- Open up RetroArch without loading a game.
- Go to the RetroArch section and start up the RetroArch (not RetroArch32) option.
- When in RetroArch, go to Settings > Directory > Overlay, then navigate to roms > bios > Overlays > Use This Directory.
- Back out to the Main Menu, then select Configuration File > Save Current Configuration
- You can now quit out of RetroArch and start up a game.
**Update** Overlay megapacks!
In addition to the overlays linked above, the artist Jdan-S has made a new megapack, which is highlighted in the video above. Additionally, Reddit user IAmTheDewd also made a megapack with 479 Super Game Boy overlays! Each of these are installed as described in this guide, but be sure to check them out because they’re pretty impressive.
Turn on overlays
To turn on an overlay, follow these steps:
ArkOS
- Open a handheld game, such as a Game Boy Color game
- Press SELECT + X to bring up the RetroArch Quick Menu
- Press B to back out to the Main Menu, then go to Settings > Video > Scaling, and make sure that Integer Scaling is ON and that the Aspect Ratio is set to 1:1 PAR.
- Press B to go back to the Video settings, and make sure that Bilinear Filtering and RGA Scaling are OFF.
- Go back to the Quick Menu, then select On-Screen Overlay > Overlay Preset. This should take you to your Overlay folder. Pick the overlay you want to use (GBC in this instance). Back out to the Quick Menu, then resume the game and verify that it is working and that you like it.
- If the overlay is not appearing, go into Quick Menu > On-Screen Overlays > Hide Overlay when Gamepad is Connected > OFF
- To set it as default, press SELECT + X again to bring up the Quick Menu, then go to Overrides > Save Content Directory Overrides.
- Quit RetroArch manually (by going to the Quit RetroArch option in the Main Menu) to make sure the saves stick.
351ELEC
Note that in the most recent versions of 351ELEC, the ability to save overrides has been disabled. To bring them back, go intro RetroArch without a game loaded, then go to Settings > User Interface > Menu Item Visibility > Quick Menu > Show Save Core Overrides > ON. You can also set Save Game Overrides > ON too if you’d like to set per-game overlays and shaders. Finally, go to the Main Menu > Configuration File > Save Current Configuration. Now you should be able to save overrides, and you will only have to do this step one time.
- In the main EmulationStation menu, head to the system you want configure (Game Boy Color, for example). Within the Game Boy Color menu, press SELECT and then Advance System Options.
- Make sure that the following settings are applied:
Game Ratio: Square pixel or Core Provided
Smooth games: Auto or OFF
Integer scale: ON
RGA Scale: Auto or OFF
- Open a handheld game, such as a Game Boy Color game
- Press SELECT + X to bring up the RetroArch Quick Menu, then select On-Screen Overlay > Overlay Preset. This should take you to your Overlay folder. Pick the overlay you want to use (GBC in this instance). Back out to the Quick Menu, then resume the game and verify that it is working and that you like it.
- If the overlay is not appearing, go into Quick Menu > On-Screen Overlays > Hide Overlay when Gamepad is Connected > OFF
- Set the Overlay Opacity to 1.00 (defaults to 0.15).
- To set it as default, press SELECT + X again to bring up the Quick Menu, then go to Overrides > Save Content Directory Overrides. If the Overrides option is not available, see the note below.
- Quit RetroArch manually (by going to the Quit RetroArch option in the Main Menu) to make sure the saves stick.
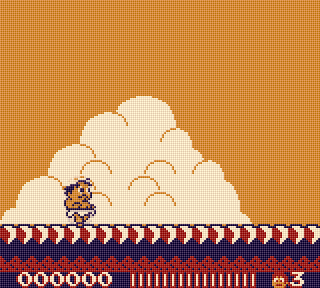
Combine overlays with LCD shaders
If you’d like to combine the overlay with a nice LCD shader (such as lcd3x or bevel) as you see above, follow these steps:
ArkOS
- Open up a game in RetroArch. While connected to the internet, press SELECT + X to open the Quick Menu, then press B to back out to the main menu. Go to Online Updater > Update GLSL Shaders, and run the update in case you don’t have the shaders installed. If you have the shaders installed already, you can skip this step.
- In the RetroArch Quick Menu, go to Shaders > Video Shaders > On, then go to Load Shader Preset > shaders_glsl > handheld > bevel or lcd3x
- If you want to adjust the shader, go to Shaders > Shader Parameters and adjust the scanlines or LCD to your tastes. For example, I like to use the lcd3x shader with a shader brightness of 6.0 instead of the standard 4.0 — this gives a very subtle grid effect.
- To set it as default, go to Shaders > Save > Save Content Directory Preset.
- Quick RetroArch manually (by going to the Quit RetroArch option in the Main Menu) to make sure the saves stick.
351ELEC
- Open up a RetroArch. While connected to the internet, press SELECT + X to open the Quick Menu, then press B to back out to the main menu. Go to Online Updater > Update GLSL Shaders, and run the update. You only need to do this one time.
- In the main EmulationStation menu, press START then go to Games Settings > Per System Advanced Configuration and select whichever system you want to work on (Game Boy Color, for example).
- Under the Shaders Set setting, select Shaders_GLSL/handheld/lcd3x or Shaders_GLSL/handheld/bevel. It’ll take a while to navigate all the way down, but you can press R2 to jump down pretty quickly.
- If you want to adjust the shader, you have to do it in RetroArch. Open up the game, then press SELECT + X to open the Quick Menu, then go to Shaders > Shader Parameters and adjust the scanlines or LCD to your tastes. For example, I like to use the lcd3x shader with a shader brightness of 6.0 instead of the standard 4.0 — this gives a very subtle grid effect.
- To set it as default, go to Shaders > Save > Save Content Directory Preset.
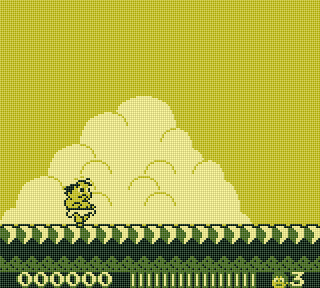

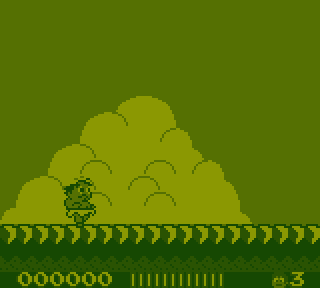
First Row:
1) Special 1 colorization with bevel shader
2) Special 1 colorization with lcd3x shader
3) GB-DMG colorization with bevel shader
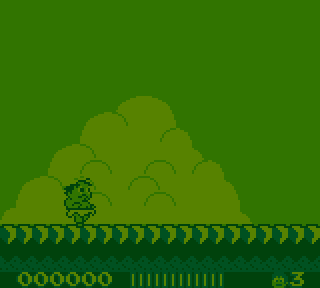
Second Row:
4) no colorization with gameboy shader
5) no colorization with gb-palette-dmg shader
6) no colorization with sameboy-dmg-response-time shader
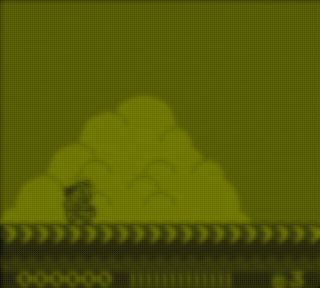
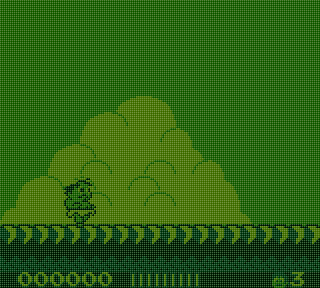
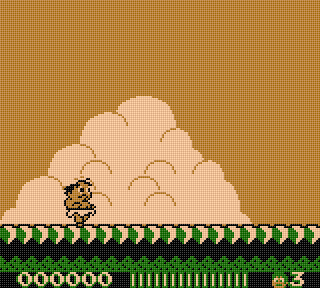
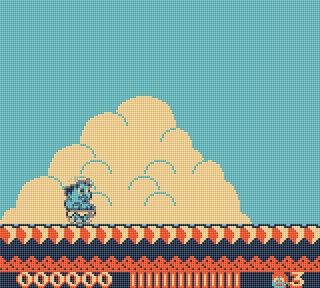
Add Game Boy colorization
Game Boy colorization can be achieved either through shaders or through the Gambatte core’s colorization options. Let’s work on shaders first:
The following shaders produce some interesting green Game Boy effects (examples above):
handheld/gameboy
handheld/gb-palette-dmg
handheld/sameboy-dmg-response-time
If you’d like to create green colorization through the colorization options, follow these steps:
ArkOS
- Open a handheld game, such as a Game Boy Color game
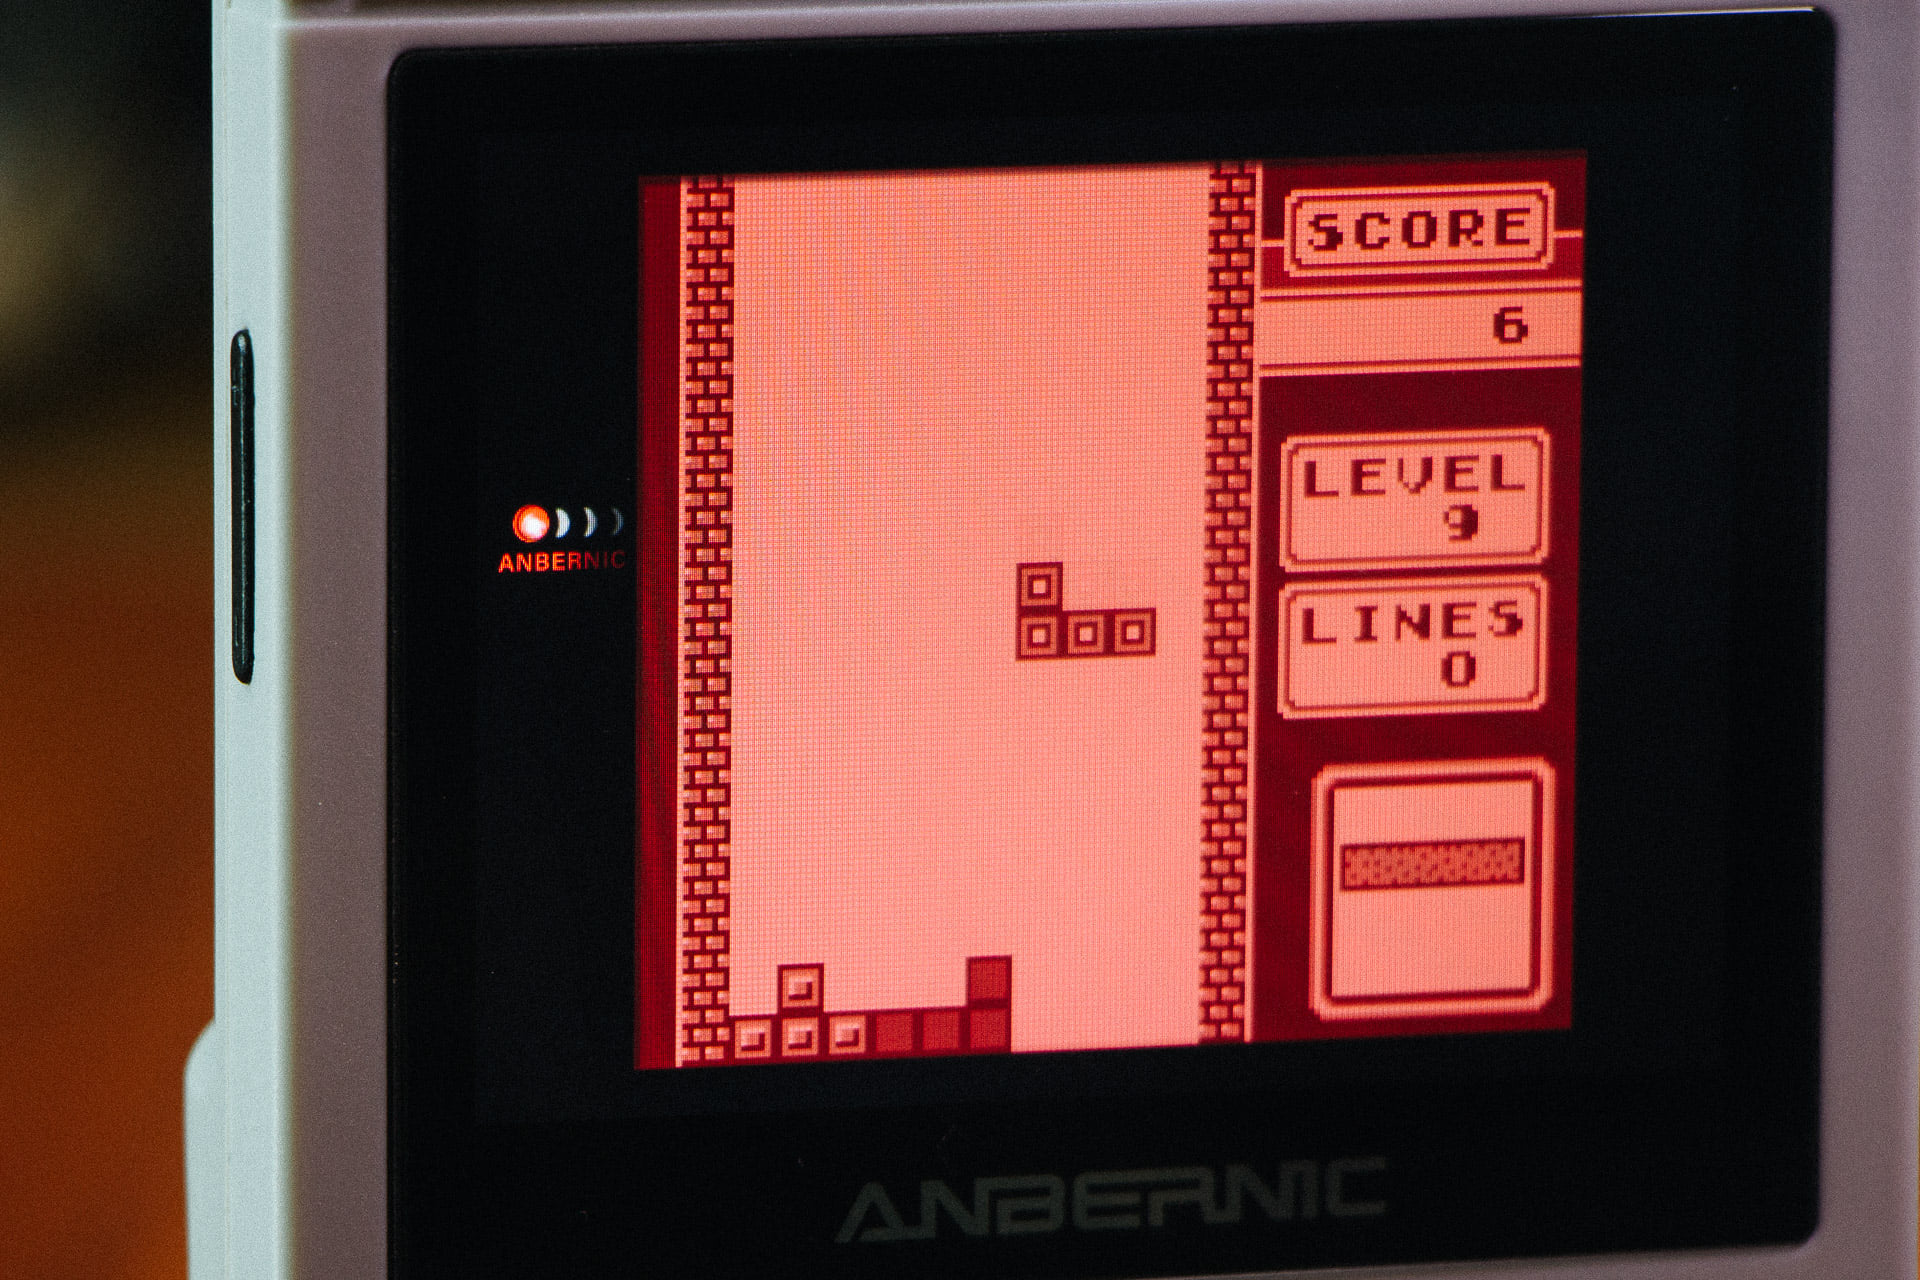
- Press SELECT + X to bring up the RetroArch Quick Menu, then go to Options > GB Colorization > Internal. Next, go to Internal Palette > Special 1 and make sure that GBC Colorization is set to GBC Only. This will produce a night light green colorization. For colorization that is more in line with the original DMG display, set it to Options > GB Colorization > DMG.
- To set it as default, press SELECT + X again to bring up the Quick Menu, then go to Overrides > Save Content Directory Overrides.
- Quick RetroArch manually (by going to the Quit RetroArch option in the Main Menu) to make sure the saves stick.
351ELEC
- In the main EmulationStation menu, press START then go to Games Settings > Per System Advanced Configuration and select Game Boy.
- Under the Colorization setting, set it to SPECIAL 1. This will produce a night light green colorization. For colorization that is more in line with the original DMG display, set it to DMG.
- If you don’t see them, open up a game in RetroArch. While connected to the internet, press SELECT + X to open the Quick Menu, then press B to back out to the main menu. Go to Online Updater > Update GLSL Shaders, and run the update in case you don’t have the shaders installed.
You can also add Super Game Boy (SGB) colorization if you’d like to recreate that effect (examples above). There are a total of 32 palettes to choose from:
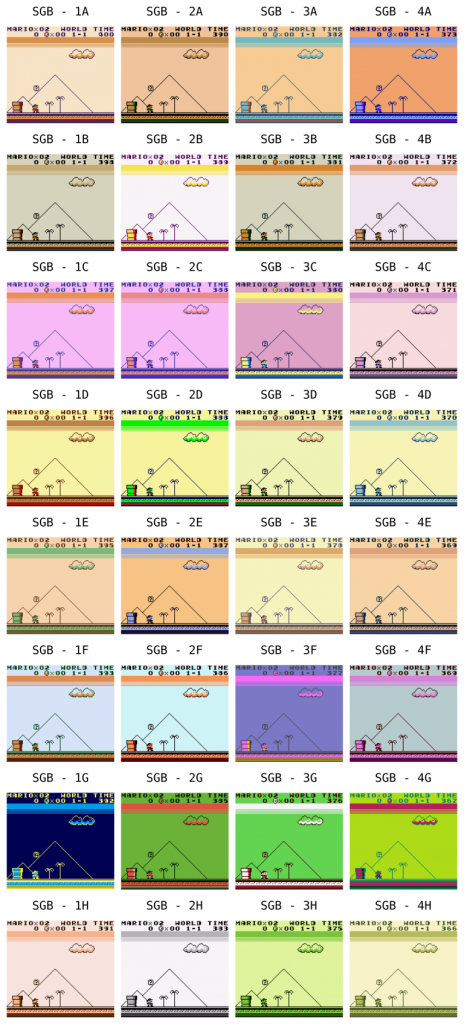
If you really want to get into the rabbit hole of colorization and palettes, check out this Libretro Doc on creating custom palettes.
Add Game Boy / Game Boy Color ghosting
LCD ghosting effects will recreate the original screen on the Game Boy. Some shaders can create this effect, but if you use the Gambatte RetroArch core (which is default), you can add it via options.
- Go to Quick Menu > Options > Interframe Blending. There you will see two LCD ghosting effects:
- LCD Ghosting (Accurate)
- LCD Ghosting (Fast)
- To set it as default, go to Overrides > Save Content Directory Overrides.
- Quick RetroArch manually (by going to the Quit RetroArch option in the Main Menu) to make sure the saves stick.
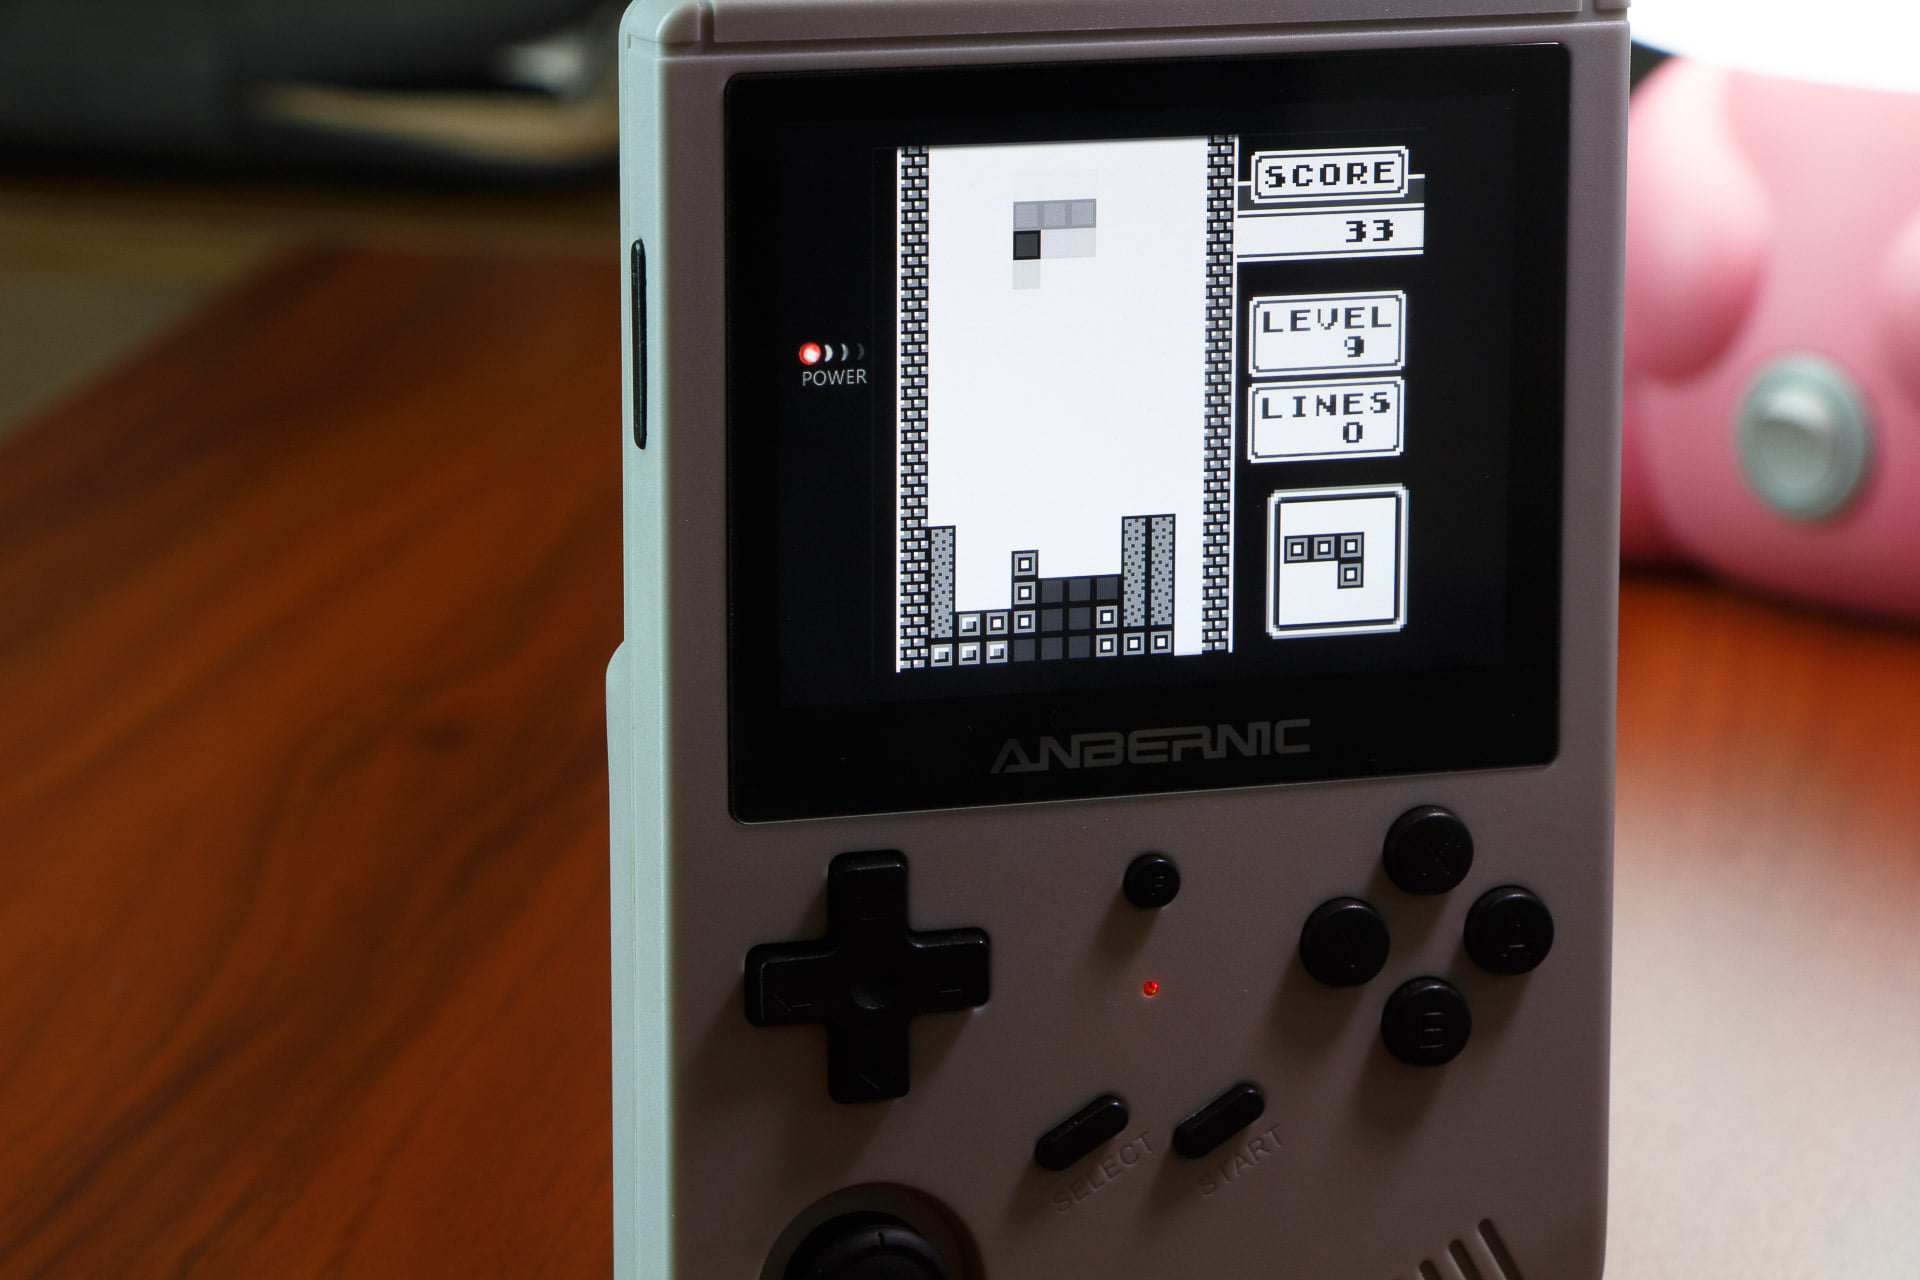
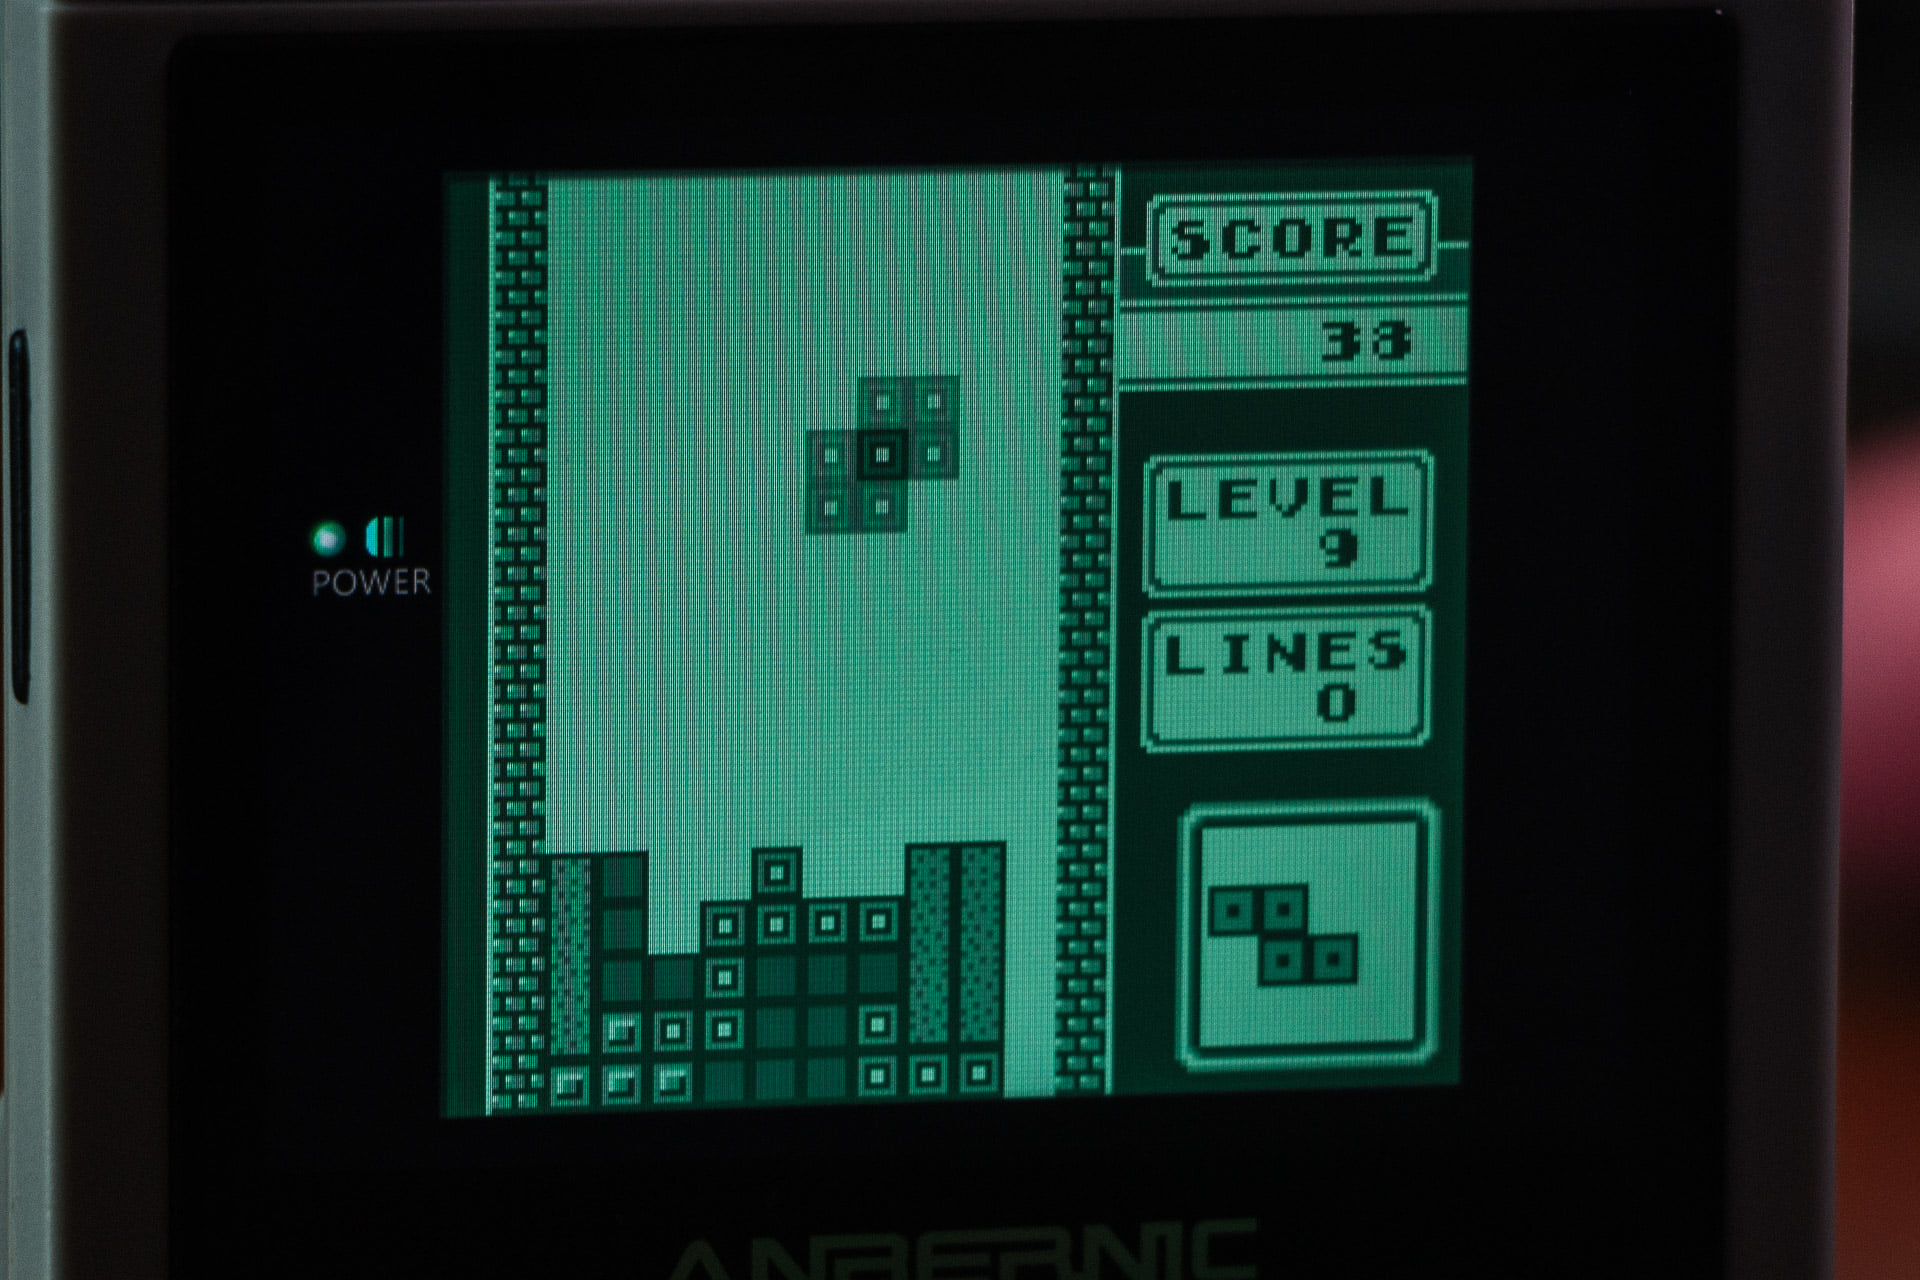
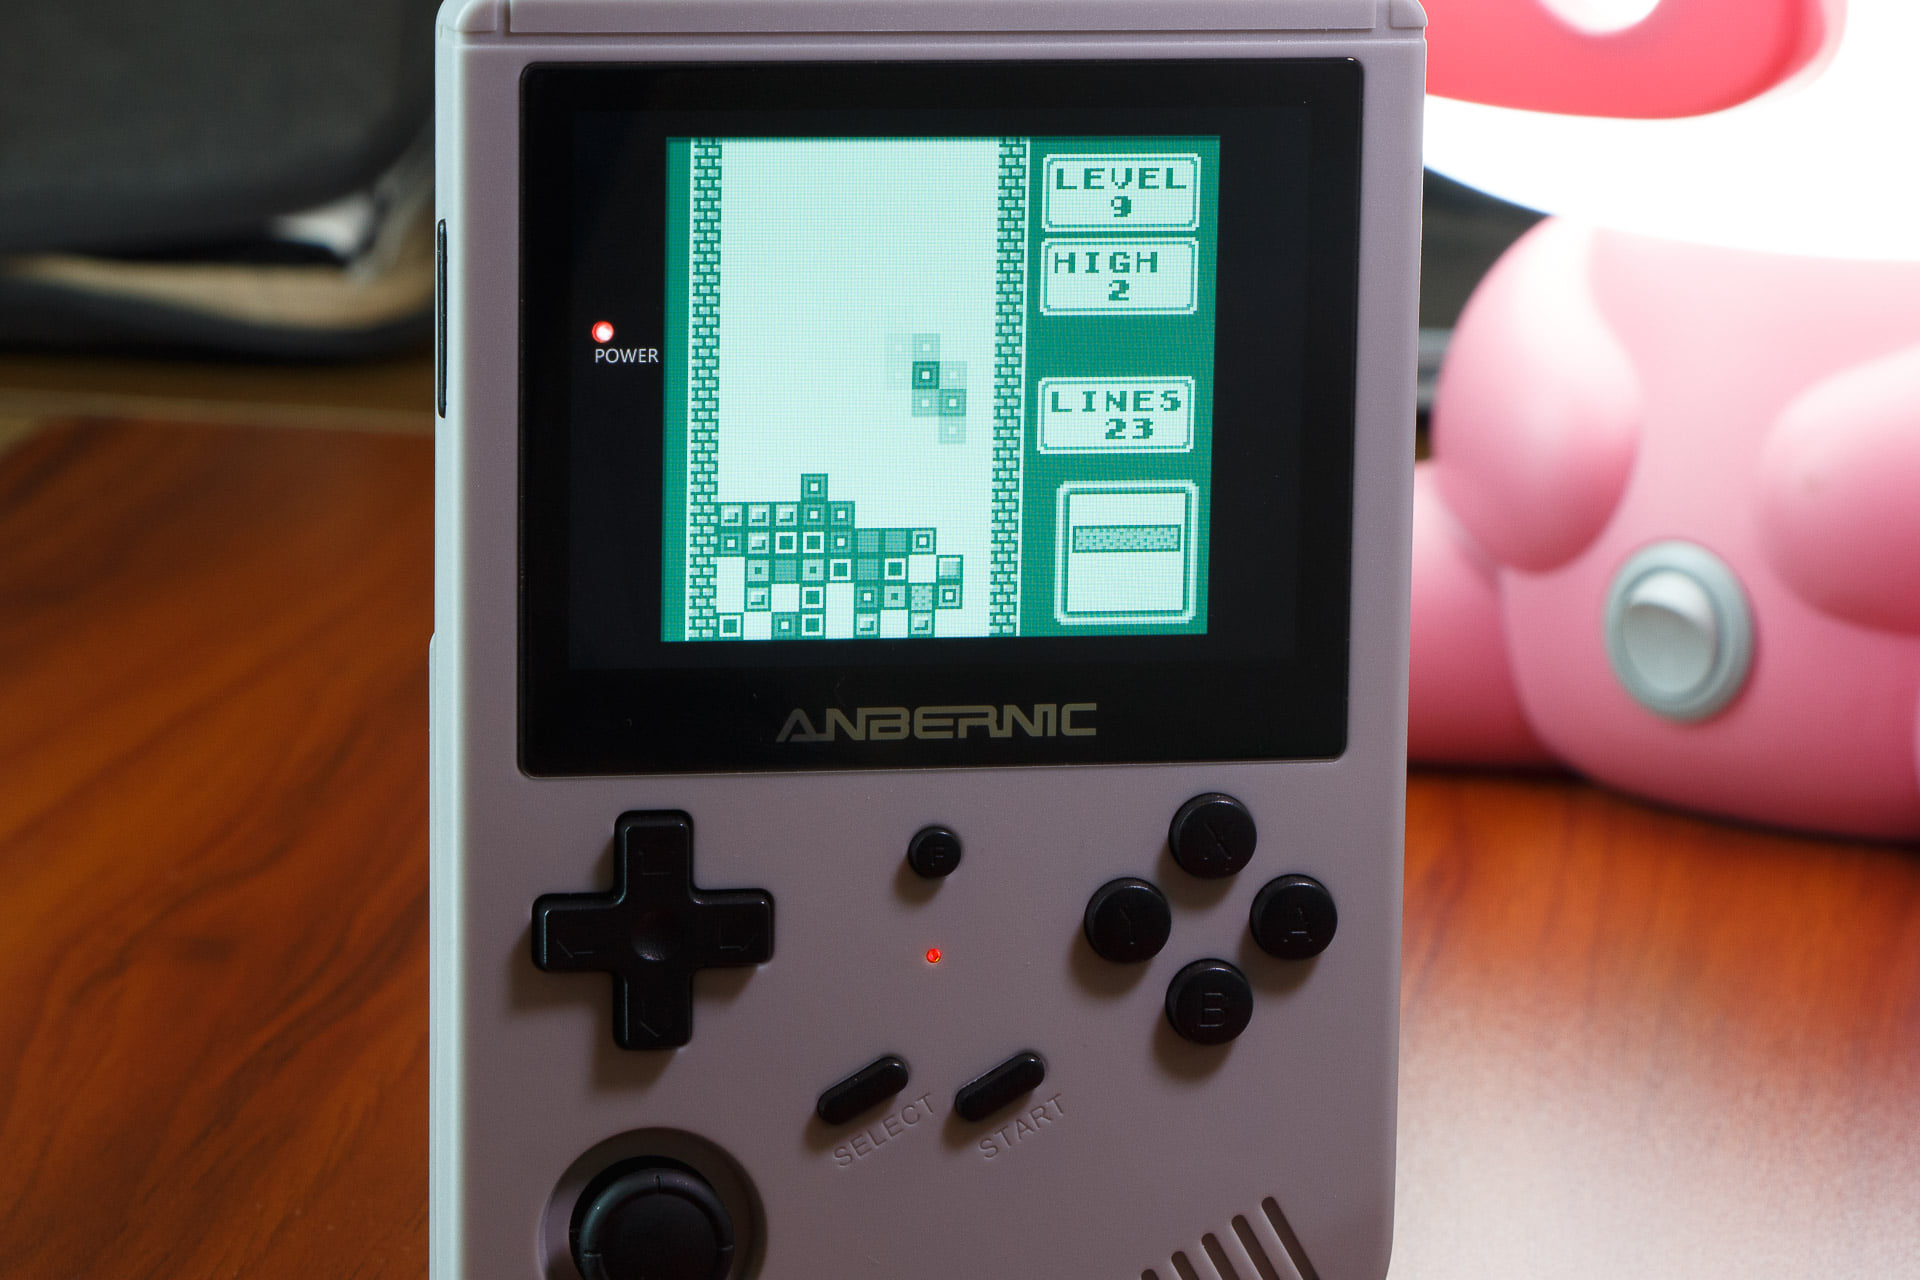
These ghosting effects will result in performance gains compared to using a shader that provides ghosting. So I suggest you use these instead of trying to figure out how to get a perfect shader working. So putting it all together, you can set your preferred Colorization effect (Special 1 or DMG), add an lcd3x or bevel LCD Shader, and add ghosting through Interframe Blending.
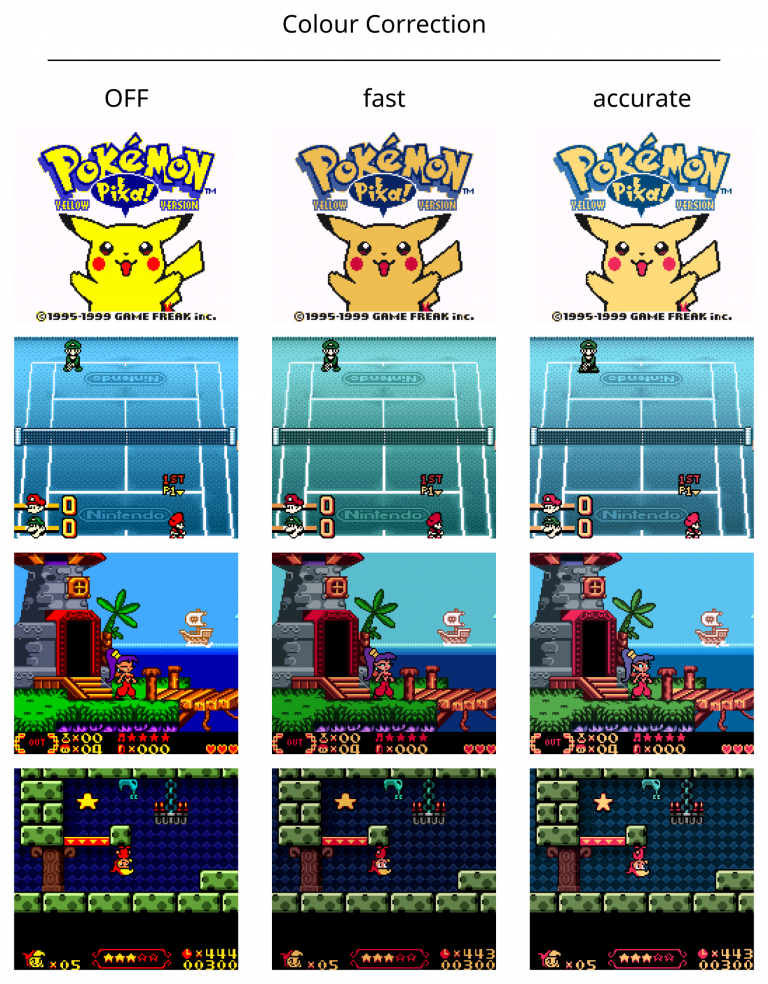
Color Correction
In addition to ghosting, the Gambatte RetroArch core also provides an accurate color correction for Game Boy Color games. This setting is found in Quick Menu > Options > Color Correction Mode and should already be set to “Accurate” by default in both ArkOS and 351ELEC. You can also adjust the “frontlight position” options within Color Correction Mode to tone down any harsh contrast in your current configuration.
Putting it all together
Hopefully this guide has given you all the tools you need to make a personalized experience for your device. Here are the settings that I prefer. They are by no means the “best” settings available, but they are my favorite. For example, I prefer the Special 1 colorization because it is subtle but still reminds me of the original screen.
| System | Aspect Ratio | Overlay | Shader | Notes |
| Game Boy | 1:1 (PAR) | GB | lcd3x | Special 1 colorization LCD Ghosting (accurate) shader brightness 6.0 |
| Game Boy Color | 1:1 (PAR) | GBC | lcd3x | LCD Ghosting (fast) shader brightness 6.0 color correction (accurate) |
| Game Boy Advance | 3:2 | No | lcd3x | shader brightness 8.0 |
| Game Gear | 1:1 (PAR) | GG | bevel | |
| Neo Geo Pocket/Color | 1:1 (PAR) | NGP | bevel | |
| Wonderswan/Color | Core Provided | No | None | |
| Atari Lynx | Core Provided | No | None |
images courtesy of J.dewitz
RG351V overlays
The Anbernic RG351V uses a 4:3 display, so the RG351P/RG351M overlays won’t work properly. Luckily, a designer named J.dewitz has you covered. He’s created overlays for the Game Boy, Game Boy Color, Game Gear, Neo Geo Pocket color, Game Boy Light, and even a bonus custom Anbernic red Game Boy Light overlay. To install, simply download this pack and follow the instructions in the included readme file.
Changelog
20MAY2021
– updated RG351V overlays
17MAY2021
– added RG351V overlays
06APR2021
– added overlay megapacks
24FEB2021
– wording changes for 351ELEC 2.0
04FEB2021
– added extra NGPC overlay
28JAN2021
– published guide

Cool, I have a GBA emulator for my phone that makes it look like the original GBA. I’ve been using a ROM hack to colorize my Metroid 2 game, but this looks much nicer. In all honesty, I like what Retroid did by rounding out the pixels and giving the games a more appealing look. I remember how the originals look, but when you can have better I’ll take the upgrade any day.
LikeLike
Great guide, I’m gonna try it soon. So far I had set up GB and GBA with shaders and ghosting, but integer scaling and overlays will probably be way more accurate.
Do you have some solution to enhance PSX aspect? Pcsx enhanced resolution is too demanding for the choosey, and I can’t find a shader that does a bit of anti-aliasing… So PSX games look kind of meh…
LikeLike
ive followed to the letter but my gamegear screen is still smaller than the overlay cutout
LikeLike
Macca, you’re not the only one. Whether doing the correct scaling or scrolling through the different ratios none of mine fit either. I DO remember my old Game Gear having a small screen, and I really don’t want to play Game Gear games that small ever again. Between me, you, and the fencepost I’m only going to do this for the original GameBoy because it looks cool. I’m enjoying playing my favorite games on a bigger screen, we used to put these ugly magnifiers on our handhelds with big adapters and weak lights. It’s not something I look back on fondly. The GameBoy setup looks awesome, and I’m glad Russ showed us how to do it.
LikeLike
What firmware are you using? And is it running the Genesis-Plus-GX core?
LikeLike
Hey Russ,
Woke up this fine Saturday morning itching to tweak these settings into my 351. They’re great, so much nostalgia from the increased display accuracy, almost just like I remember from that distant, oh so very cool childhood. As a reference point I started with your settings and along the way I’ll surely find out my personal preferences but your suggestions certainly come very close to mine. I managed to implement them just fine except for Game Gear. Somehow when selecting 1:1 PAR and integer scaling, the image shrinks to post stamp size, not scaling correctly to the overlay. It’s probably something very easy I’m overlooking but bugs the hell out of me now that the other systems display perfectly within their respective overlays. If you or anyone else here has any idea on what causes this and how I can fix it, let me know.
Great content as always, you wouldn’t believe the amount of fun I’m having through your extensive guides, knowledge and love for retro gaming. Keep it up!
Vince, the Netherlands
LikeLike
Hey Russ,
a quick question about the overlays. My GB overlay appears a lot darker than the one in your pictures, so I did a little bit of searching in the options in the quick menu: I found On-Screen Overlay >> Overlay Opacity. My default value was 0.15 – for whatever reasons – it’s almost invisible! Which setting do you use?
LikeLike
My default was set to .70!
LikeLiked by 1 person
Hey Russ, it’s me again and something went wrong: Now I’ve got the GBC overlay on every home computer and/or console that doesn’t fill the screen. Do you know how to solve the problem? Thank you in advance and have a nice weekend.
LikeLike
Hi Russ
Great guides thank you. I can’t seem to get the Atari Lynx ratios right though.. Whenever I open the Retroarch menu in game, it rotates the screen 90 degrees! Any idea what I’m doing wrong?
Keep up the good work!
LikeLike
Hi Russ,
When I run game gear I get a very tiny screen. What am I missing? I’m running 351elec with factory settings.
LikeLike
Overlays are not working on the 351ELEC 2.0
LikeLike
you have to place the contents in RetroArch’s overlay folder
LikeLike
Hey Russ, hoping to clarify a couple of things for 351ELEC 2.0.
1. In the “Download and install overlays” section, you say:
“In your SD card’s bios folder, create a folder named “bezels”, and add the overlay files (.cfg and .png files). If you are using 351ELEC, it will already have that folder.”
When I look in the Games partition of my 351ELEC SD card, I see a “bezels” folder on the top level next to the “bios” folder, but I don’t see a “bezels” folder inside that “bios” folder. Just want to clarify whether I should be using the “bezels” folder already there or creating a new one inside the “bios” folder.
2. In the 351Elec section of “Turn on overlays,” you say:
“Press SELECT + X to bring up the RetroArch Quick Menu, then select On-Screen Overlay > Overlay Preset. This should take you to your Overlay folder. Pick the overlay you want to use (GBC in this instance). Back out to the Quick Menu, then resume the game and verify that it is working and that you like it.”
Just to clarify, should that say “bezels” folder instead of “overlay” folder?
These are both closely related, of course. Just want to make sure I have the right folder in the right position. I’m wondering if this might explain why others in these comments have mentioned using 351Elec 2.0 and having issues with themes? Or maybe I’m overthinking it, lol.
Thanks so much for all your hardwork!
LikeLike
Thanks a lot for this great guide.
To all of you who experience the tiny game gear screen, it’s because the game is a master system rom (so integer scaling shrinks it a lot because of the 256 × 192 resolution). If you copy a proper game gear rom, you will have the results Russ gets on the guide.
Other problem is that, from what I gather on forums, game gear screen was actually 4:3 non square pixel, so the bezel provided in the file does not allow for a perfect recreation of how we played back then. You can see it in Sonic triple trouble, where rings become actual circles only with 4:3 aspect ratio.
Russ, do you think it would be possible to propose a GG-3 with a 4:3 window? I tried to mess around with photoshop but I just can’t get it to work.
LikeLike
Thank you RGC for all of your work and help!
Has anyone got the custom GBC palettes working on an RG351v? I’ve seen a few different suggestions for what folder to leave them in. I don’t think it’s an issue with my file formats or names. Thanks.
LikeLike
Finally got custom palettes to work, here is the info I needed:
Use the storage/roms/bios folder
Set file permissions to 755
Add a line to the end of each .pal that says “slectedScheme=Example Name” (including typo)
Now I just wish there was an option to select these from a list (like on RG300 RetroFW Gambatte) versus having to name one per title. I used to like to change palettes on the fly, and I don’t particularly like most of the options built into the current Gambatte core.
LikeLike
What’s the proper way to make the shader parameter changes stick? I tried Save > “Save Content Directory Preset” under shaders but if I exit RetroArch and start the game again the parameters are back to defaults.
LikeLike
Just in case someone else was having the same issue: using 351ELEC, I had picked the shader from “Advanced System Options”, instead of picking it from within RetroArch, where I was instead just setting the parameters.
To fix this, I reset the shader choice in “Advanced System Options” to Auto, then launched one of the games, picked the shader and set respective parameters from within RetroArch, saved shader choice and parameters with “Shaders > Save Content Directory Preset” and used “Quick Menu > Overrides > Save Content Directory Overrides”. The last step is necessary as apparently the configuration indicating that shaders are enabled is stored by that step, not the previous one under the Shaders menus (video_shader_enable = “true”).
LikeLike
Thank you so much for this! I was struggling with the same issue.
LikeLike
I followed your notes to the letter, but I can’t get it working. I’m in 351ELEC: I put the overlays in the ‘bezels’ folder that’s already on the sd card, but it only shows ‘default.cfg’ and not the rest. Even though I can see them in Windows Explorer. Creating a different folder has no effect either, since it won’t show up when I choose ‘Overlay Presets’ in RetroArch.
Anyone any ideas?
LikeLike
Sorry didn’t realize there is a reply feature. I left another comment in the chain with how to do it.
LikeLike
I have the same issue. Tried everything but could not get it to work 😦
LikeLike
Hey Coen, I was just as confused but you can actuall select the topmost option “Parent Directory” until you are on path “/” then you can navigate to the correct place e.g. “/storage/roms/bezels/” if you have placed your bezels on into the “belezels” folder on the SD root. If you put them into a folder inside the “bios” folder simply navigate to “/storage/roms/bios/bezels/” by selecting the appropriate folder, or anywhere else you desire 🙂
LikeLike
SNES:
what settings or shaders can you recommend here? The shader crt_geom is cool but unfortunately it stutters, but it looks really nice
LikeLike
Tried this with my 351ELEC Crazy Hedgehog but the system keeps deleting the files. I tried copying them into bezels folder in the bios folder but after I plug in the SD Card into my rg351p the files are lost. I can confirm this because after removing the sd card from the rg351p and inserting it back into my PC and I check the bezel folder, the .cfg and .png files are gone.
LikeLike
Hi Russ, this issue has been resolved. The root cause was the sd card. I purchased a new one, apparently my old samsung sd card was already at it’s end point. Thanks for these amazing guides you’re creating for us.
LikeLike
Just got my 351v and I added the newest 351elec firmware and after following the instructions the bezels for gameboy games (all I have tried so far are large and overlaying the actual game screen. I have all the settings exactly the same BUT I can’t find the ‘RGA Scale: Auto or OFF’ setting. Maybe that’s the issue?
This is all on 2 new SD cards (OS and Rom cards) that were completely formatted and then set up. Any ideas? This is my first portable emulator device. I have used Retroarch on my Shield TV but don’t want bezels on that.
LikeLike
Oh, FYI this is the Crazy Hedgehog version.
LikeLike
Thhis is a great post thanks
LikeLike
An update for newer devices like RG##XX H/V/plus with Knulli/Batocera would be appreciated.
Knulli has The Bezel Project, but I don’t understand how to use it and apply it to my roms.
LikeLike