

Last updated: 14FEB2021 (see Changelog for details)
NOTE: Some elements of this guide are now unnecessary thanks to the new Simple30 firmware, so check that out instead. The Add-On Pack is now superseded by the Simple30 firmware.
The PocketGo S30 has its share of flaws (see my video review for more on that), but one of its best features is that it is easily customizable. So in this guide I’ll show you how to squeeze as much functionality out of your device as you can, as well as how to tweak the user interface to fit your needs.
Table of Contents:
The basics
Back up the stock microSD card
Upgrade your microSD card
PocketGo S30 add-on pack
Add game files to your device
Organizing the emulators
Removing unwanted systems from your device
Changing the themes
Adding boxart and video previews
Performance notes and known issues

Changelog
The basics
The PocketGo S30 is a very simple device. Press and hold the POWER button for a few seconds to start it up. Within the Settings menu you’ll be able to change the language from English to Chinese, as well as adjust the screen brightness from 1 to 10. As far as I can tell, there is no other way to adjust the screen brightness.
Press left and right on the d-pad to cycle between the various systems available, and press the A button to choose a system. There you will see a listing of available games; press A again to choose a game. Once the game boots up, tap the POWER button to bring up the emulator menu. Some emulators will have a robust menu with several options, while others will simply allow you to do basic tasks like restart the game or save state.
You can access the unit’s SD card either by removing the SD card and inserting into your computer, or you can actually just plug the device into your computer via USB cable and access everything via “localhost”. Note that file transfer via localhost is significantly slower than via the actual SD card, and some files will be read-only.
This device does not a have sleep function, nor a screensaver function. By default, to shut down the system, simply press and hold the POWER button for a few seconds. Be sure to close the current game before powering down, otherwise it will mess with your save files and settings (see Performance Notes and Known Issues). Note that the add-on pack I’ve enabled a safe shutdown system to make sure it preserves your save files and settings.
Back up the stock microSD card
The PocketGo S30 is unique in that its firmware (operating system) is actually flashed onto the device itself, and the microSD card simply acts as storage for the emulators, game files, and wallpapers. That’s really handy because moving everything over to a new SD card is as easy as formatting a new card to FAT32 and transferring the folders over.
So the first thing you should do when you get your PocketGo S30 is to backup those system folders so that we can restore everything if things go south. To do so, simply insert the original SD card into your computer using a USB SD card adapter, and then copy all of the folders onto your computer. If you’d like, you can skip the “roms” folder since it’s about 2.5GB and you’re probably better off loading your own game files, which we’ll cover in another section below.
Upgrade your microSD card
The microSD card that comes with the device is only 16GB in size, which is fairly limited if you plan on adding CD-based games like Sega Dreamcast or Sony PSP. I recommend you upgrade to a 128GB or 256GB microSD card, from a reputable brand like SanDisk or Samsung, so that you have a reliable storage option with plenty of space for your game collection. It is also confirmed that 512GB cards also work fine on this device. Here is a link to my recommended cards.
In order for this card to work on your device, you will need to format it to FAT32 file system. Windows can only format cards which are less than 32GB to FAT32, so you will need to use a program called guiformat – be sure to change the “Allocation Unit Size” to 65536 (or the highest that the program allows you to choose) in the drop-down menu. For Mac, you can use the Disk Utility program that comes with MacOS to format (“erase”) the card, with MS-DOS (FAT) as the format. In both cases, name the card “POCKET”.
Once you’ve formatted the card, go ahead and move all of your backup folders to the new card. Or if you’d like, here is a fresh .zip file of the SD card contents (minus ROMs and BIOS files, and updated with the PocketGo S30 add-on pack, which is covered in the next section).
NOTE: this add-on pack is now superseded by the Simple30 Firmware, so I recommend you use that instead.
I’ve gone ahead and created a special add-on pack which will update all of your emulators and wallpapers from the stock card, so that you can have the best experience possible. This pack will change out all of the existing emulators with RetroArch cores, preconfigure the screen for each system’s native aspect ratio, and smooth out the text for optimal resolution.
To download this pack, head over to my GitHub page and click on the “Code” button at the top-right of this page, and then select “Download Zip”. Unzip that file and follow the instructions in the ReadMe file, which I’ve also included below:
- Insert your S30 microSD card into your computer.
- UPDATE WALLPAPERS: On your SD card, remove the skins/Default folder, and remove the ‘wallpapers’ folder. Place the new ‘wallpapers’ folder from this pack into the skins/Default folder. If you’d like, you’ll find subfolders with other themes (Futura, ckau, epicnoir, etc.), and you can use those instead — just move the images into the skins/Default folder. Some of these alternate themes have their own font; if you find a font.ttf file in the subfolder, move it to the skins/Default folder and replace the font.ttf file that’s already in there. If they do not contain the “poweroff.png” image in their skins collection, continue to use the default image.
- UPDATE LAUNCH FILES: On your SD card, go to the ‘sections’ folder, and remove the ’emulators’ folder. Place the new ’emulators’ folder from this pack in the ‘sections’ folder.
- MOVE ‘SAVES’ FOLDER. Move the ‘saves’ folder in this package to the main (root) directory of your SD card.
- MOVE ‘SOFTSHUTDOWN’ FOLDER. Move the ‘softshutdown’ folder in this package to the ’emus’ directory of your SD card.
- UPDATE EMULATORS. On your SD card, go to the ’emus’ folder, and remove the ‘retro’ folder. You can store it on your computer for safe-keeping if you’d like. Place the new ‘retro’ folder from this pack into the emus folder. Then, unzip the file named “unzip_and_add_to_retro_folder.zip”, and add its contents to the new retro folder on your SD card.
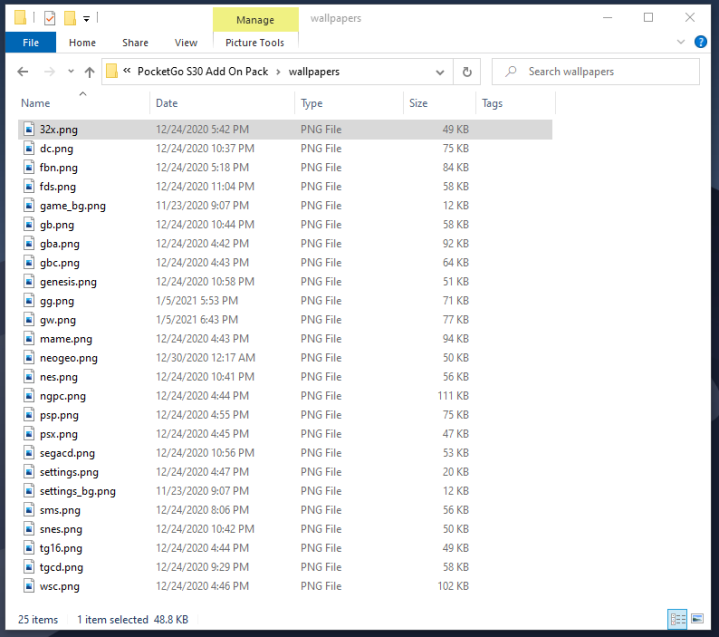
- VERIFY ROMS FOLDERS: On your SD card, go to the ‘roms’ folder and change the folder names so they are as follows (minus the information in the parenthesis). Also, delete the folder named “npg”, this is an unecessary folder. You will need to create new folders for some systems, and rename some others:
32x (new)
atari2600 (new)
c64 (new)
dc (no change)
fbn (previously named “fba”)
fds (new)
gb (no change)
gba (no change)
gbc (no change)
genesis (previously named “md”)
gg (new)
gw (new)
lynx (new)
mame (no change)
neogeo (new)
nes (previously named “fc”)
ngpc (previously named “ngp”)
psp (previously named “ppsspp”)
psx (previously named “ps”)
segacd (new)
sms (new)
snes (previously named “sfc”)
tg16 (previously named “pce”)
tgcd (new)
tic80 (new)
vb (new)
wsc (previously named “ws”)
zxspectrum (new)
8. ADD BIOS FILES: Ensure you have the following BIOS files in the appropriate locations on the SD card. These BIOS files are not part of the add-on pack, you will need to find them yourself.
- Game Boy Advance: place the gba_bios.bin BIOS file in the bios folder
- PlayStation: place scph1001.bin BIOS file in the bios folder
- Sega Dreamcast: place dc_boot.bin and dc_flash.bin BIOS files in the bios/dc folder
- Neo Geo: place the neogeo.zip BIOS file in the bios folder
- Famicom Disk System: place the disksys.rom BIOS file in the bios folder
- Sega CD: place the bios_CD_E.bin, bios_CD_J.bin, and bios_CD_U.bin BIOS files in the bios folder
- TurboGrafx-CD: place the syscard1.pce, syscard2.pce, and syscard3.pce files in the bios folder
- Atari Lynx: place the lynxboot.img BIOS file in the bios folder
Add game files to your device
To add games to your device, simply drag the ROM files to the respective subfolder within the SD card’s “rom” folder. Here is a breakout of each folder:
| Folder Name | Game System | Accepted File Types |
| 32x | Sega 32x | .32x, .zip |
| atari2600 | Atari 2600 | .a26, .bin, .zip |
| c64 | Commodore 64 | .d64, .zip |
| dc | Sega Dreamcast | .bin/.cue, .cdi, .gdi, .zip, .7z, .chd, .iso |
| fbn | FinalBurn Neo | .zip |
| fds | Famicom Disk System | .fds, .zip |
| gb | Game Boy | .gb, .zip |
| gba | Game Boy Advance | .gba, .zip |
| gbc | Game Boy Color | .gbc, .zip |
| genesis | Sega Genesis | .bin, .md, .zip |
| gg | Sega Game Gear | .gg, .zip |
| gw | Game & Watch | .mgw, .zip |
| lynx | Atari Lynx | .lnx, .zip |
| mame | MAME 2003-Plus | .zip |
| neogeo | Neo Geo | .zip |
| nes | NES | .nes, .zip |
| ngpc | Neo Geo Pocket (Color) | .ngp, .ngc, .zip |
| psp | PlayStation Portable | .iso, .pbp, .zip |
| psx | Sony PlayStation | .bin/.cue, .pbp, .zip |
| segacd | Sega CD | .bin/.cue, .chd, .iso |
| sms | Sega Master System | .sms, .zip |
| snes | SNES | .smc, .sfc, .zip |
| tg16 | TurboGrafx-16 | .pce |
| tgcd | TurboGrafx-CD | .bin/.cue, .iso, .chd |
| tic80 | TIC-80 | .tic |
| vb | Nintendo Virtual Boy | .vb, .zip |
| wsc | Wonderwasn (Color) | .ws, .wsc, .zip |
| zxspectrum | ZX Spectrum | .tzx, .tap, .z80, .rzx, .scl, .trd |
Organizing the emulators
You may have noticed that the order of the systems in your main menu on the stock SD card is totally haphazard — they appear to follow no rhyme or reason.
That’s because the order of your systems in the device’s main menu is based on the order of the files in the sections/emulators folder. So this is why they appear so haphazardly when you’re scrolling through the main main, it’s because they’re in alphabetical order based on the name of the emulator! There’s a super easy fix for this: just rename the file to whatever you want. For my add-on pack, I set them up in a numbered order, like this:

Now my systems follow a logical order: arcade systems, Nintendo systems (by order of release and consoles before handhelds), Sega systems, Sony systems, NEC systems, then outlying systems (Neo Geo Pocket, Wonderswan, etc.). If you want them to be in a different order, just rearrange the numbers in the file names.
Removing unwanted systems from your device
I’ve loaded up my add-on pack with a lot of systems, and some of them you may not be interested in. The easiest way to remove these systems from your menu is to go into the sections/emulators folder on your SD card and remove any undesired emulator launch files.
Changing the themes
To change a “theme” for your console, all you have to do is change out the wallpapers. Simply replace the existing pictures with a similar .png file (480×320 pixels), and use the same name as the existing picture. The existing wallpapers are found in the skins/Default/wallpapers folder of your SD card.
For my own “theme”, I used the simple images from the ckau-book Batocera theme. I think they’re a nice complement to the simple interface of the PocketGo S30. They are included in the add-on pack. Within the skins/Default/wallpapers folder of the add-on pack you’ll find a number of optional themes to use as well.

Adding boxart and video previews
Note that this method will only work for Windows PCs.
I recommend getting all of your game files in order, and place them on your SD card, and then run Skraper directly onto the SD card. This will simplify the process, and if you happen to add new ROMs to your card, you can run Skraper again.
Adding this media to your games will have a secondary effect: it will clean up all of your game files in the menu. So instead of seeing “Donkey Kong Country (Rev A) (USA).smc” (or however your game is named) in the meu, it will just say “Donkey Kong Country”.
- Download Skraper and unzip the file; place the unzipped folder somewhere easy to access. In the unzipped folder, open the SkraperUI.exe file, which will bring up the program. Run the wizard, and select “I don’t have an account and I don’t want to register”, or register if you’d like (registering may improve your download speed).
- You’ll then see four different frontend selection options, pick the “RECALBOX” option. If you haven’t already, plug the microSD card into your PC. On the next screen, click the folder icon and navigate to your SD card’s ROMs folder. Check the “Include non-Recalbox rom folders” box, then click the “Next” button. All of your gaming systems should fill the screen; if they don’t, we’ll take care of that in the next step. Click the “Next” button to move on, then press “Next” again.
- If some of the systems are not showing up in the left side menu, then press the “+” button and select the system, then press ok. Then, make sure the “Games/Roms folder” option shows the correct path for that system — it should look like G:\roms\32x, where “G” is the letter that Windows assigned to your SD card, and “32x” is the folder you used to store your system’s ROMs.
- Now let’s configure your global settings. On the tabs at the top of the program, select the “GAME LIST” tab. Under “Gamelist type”, keep it set to “EMULATIONSTATION GAMELIST.XML”, but in the menu below, change the setting to “No Backup, Create New or Overwrite Existing”. Now go to the “MEDIA” tab. Press the “-” (minus) button near the left of this page, which will delete the “4 IMAGES MIX” icon and leave you with just the “BOX 3D” icon. Below the icon you’ll see “Media type:”, change the rightmost option from “BOX 3D” to “BOX 2D”. Under “Output folder”, change it to “%ROMROOTFOLDER%/images”. Make sure that “Keep image ratio” is still checked. Now, press the “+” (plus) button to add a new media type, and then under “Media type” change it to “NORMALIZED VIDEOS”, and change the “Output folder” to “%ROMROOTFOLDER%/videos“.
- Finally, you need to tweak your disc-based systems so they don’t get hung up. On the left menu you’ll see a list of all the consoles, pick one of the disc-based systems (let’s do Sega CD). This allows you to make specific configurations for that system. Go to the “GAMES & FRONT-END” tab, and make sure that “Use specific configuration for SEGA CD” is checked. Underneath, for the “Games/Roms file extensions”, delete the “.bin”; now do the same for all of your other disc-based systems (PlayStation, PC Engine CD, etc).
- Once everything is set up, press the Play icon at the bottom-right of the screen. You can either scrape the images one system at a time, or you can select “All Systems” from the left menu and do them all at once. Sit back and watch the computer do all the hard work; once it’s done, you’ll hear a bit of Final Fantasy music to indicate that the task is finished.
Note that if you load both videos and images onto your card, the videos will override the images, and you will only see the videos in the menu. So you’ll have to choose one or the other. You could always load up the images and videos all at once, and then rename the video folders to something else (like “videoz”) and the software won’t load the videos — but then you can have access to them later without having to re-scrape everything, all you have to do is change it back to “videos”.
Performance Notes and Known Issues
Sony PSP: You will need to remap the face button controls in the PPSSPP emulator. By default, it is set to 2x PSP resolution, which looks nice but may cause slowdown. You can set it to 1x PSP resolution to improve performance, but text will be hard to read. In general, I suggest using Auto frameskip, set to 1.
Safe Shutdown: Be sure to use the new “safe shutdown” method. If you cycle through your available systems, you will see a screen with a power switch icon and the word ‘shutdown’. Press the A button to safely shutdown your system without using your power button. The best way to think of this is that you will use the POWER button to turn ON your system, and the shutdown icon to power OFF your system. This will ensure that your saves and configuration files persist.
Core options file issue: If you power down the system without using the safe shutdown method, the retroarch-core-options.cfg file may get overwritten, and you will lose some functionality (green colorization in GB, high resolution in Dreamcast). If this happens to you, paste this code in the emus/retro/retroarch-core-options.cfg file on your SD card.
Aspect ratio: If you don’t like the fullscreen aspect ratio, one trick is to go into the emus/retro/retroarch.cfg file (or retroarch-gb.cfg file for Game Boy, for example) and change the “aspect_ratio_index” from 5 to 21. If there isn’t a retroarch-“system”.cfg file for the system you want to alter, simply duplicate the default retroarch.cfg file and rename it to whatever you want (“retroarch-genesis.cfg”, for example), then go into the sections/emulators folder and alter the launch file using a text editor to point to that .cfg file instead.
These aspect ratio indexes do not follow the conventional guide (which I’ll post below) so you will have to experiment to find the right number for you. For example, I chose an aspect ratio index of “5” for fullscreen (3:2) even though it’s technically a 2:1 ratio. As far as I could tell, none of these equate to a 4:3 aspect (“21” is close, but I think it’s actually 8:7 or 1:1). But I’ve made approximations based on what I could guess.
0 = 4:3
1 = 16:9
2 = 16:10
3 = 16:15
4 = 1:1
5 = 2:1
6 = 3:2
7 = 3:4
8 = 4:1
9 = 4:4
10 = 5:4
11 = 6:5
12 = 7:9
13 = 8:3
14 = 8:7
15 = 19:12
16 = 19:14
17 = 30:17
18 = 32:9
19 = config (video_aspect_ratio setting)
20 = 10:9 (1:1 PAR)
21 = Core Provided
22 = Custom
Changelog
14FEB2021
– added links to Simple30 firmware
29JAN2021
– updated links to Add-On Pack v1.7 with new safe shutdown method
25JAN2021
– updated links to Add-On Pack v1.6 with aspect ratio fixes and working Dreamcast triggers
24JAN2021
– added save game fix notes
17JAN2021
– updated S30 backup SD card contents
– added note about save files and aspect ratio
12JAN2021
– updated S30 backup SD card contents
– updated Futuris theme
11JAN2021
– added Atari 2600, Commodore 64, Tic-80, and ZX Spectrum
– reverted to original PS1 emulator due to L2/R2 mapping issue
08JAN2021
– published guide
– added Futuris theme
– added required Neo Geo, Lynx, and Dreamcast bios locations
– added Atari Lynx and Nintendo Virtual Boy
– added S30 backup SD card contents

Another excellent guide. I love the look of this handheld and the performance is better than expected. Thank you for the improvements you’ve made.
LikeLike
Fantastic emulator updates. Makes SNES and nes playable. Just one thing after upgrading L2 and R2 no longer work in the psx emulator or Dreamcast. Is there anything I could try?
LikeLike
Something I just thought of- what Snes core does this most recent build use? If it uses the snes9x core I can’t think of any reason it wouldn’t support MSU1 games… Maybe I will try it myself after work here if no one else has tried?
LikeLike
Which would you prefer if you had to choose today? This or the RG351P?
LikeLike
Hi I have both, the rg351p and s30. The review is spot on. The s30 is a great simple system, but from stock is poor. The updates and improvements made here are excellent. However even with those, for me the 351p is much better. The s30 reminds me of the supbor q400, in terms of what I felt like when I received it (happy with the controls, and the simple software – retroarch with most options inaccessible), but personally I prefer the q400 (and the rg350) to the s30 as well even though I love the 8bitdo look. For me the un-optimised emulators are shocking from stock and the dpad isn’t as great as the q400 for Street fighter, KOF .etc.
The RG351P for me is miles better (especially with351 elec)
LikeLike
Hello, would anyone be willing to explain to me how to make / fix emulators so they run on this console? I couldn’t edit the ones i have. Also, I have a custom wallpaper set for each system with yesterday’s update in case you want to see/use it.
best regards, thanks big time for the work!
LikeLike
anyway anyone can help me with setting up DOSBOX?
LikeLike
Excellent guide – thank you for all the hard work! I have a question about the single channel speaker in the PocketGo S30. Is there a way to filter the audio to mono / mix both left and right channels into a single channel? I have tried using a DSP plugin (mono.dsp) but can’t seem to fix this, and not sure it is even possible.
LikeLike
Ive added your files but mame and fbn dont load my roms?
please help
everything else is top notch
LikeLike
Hey there! Thank you so much! This is a really nice guide and makes the Pocketgo S30 much cleaner. I was wondering if there is a way to enable turbo mapping to the Y and X buttons for systems like NES or TG16? I appreciate you!
LikeLike
I am having a save issue. No games will save their info, and the save state some times works. will this be fixed in update ?
LikeLike
Hello, this is great! The games looks a lot better, thank you for doing this. I’m also having the same save issue as Mike. It seems hit or miss if a game save, or save state will actually work. The problem doesn’t show itself until after the unit is shutdown, and turned back on. I make sure I only shut down from the menu, never in a game. The retroarch-core-options.cfg file is consistently corrupted as well. When I view the save states, game saves, or config file in Windows they display as 0 byte files. I tried low level formatting the MicroSD and rebuilding it, but had the same result. I’ve ordered a new SD card to see it this resolves it.
I’ve also noticed the emulators always saves to state 0. Is there a way to change what save state is used? I’m thinking I may save the state multiple times in different slots and hope at lease one survives a reboot? Thanks for everything. 🙂
LikeLike
I am also having a problem loading mame and FBN roms. They are correct, from the correct emulators and sets. Any ideas? Maybe missing bios files? (not 100% if 2003 plus and fbn use bios files?)
LikeLike
There aren’t any bios requirements for MAME and FBN. Are you using ROMs from full non-merged sets? Those will be bundled with everything you need. That’s what I use and I haven’t experienced any games not loading. If you give me a specific title I can check it myself and let you know.
LikeLike
Funny, I actually reformatted my sd card, added the most up to date new files and re-added the same roms I was using before and they now work! I have no clue what I did wrong the first time lol
LikeLike
Man, I don’t think I can get a device like this without sleep functionality. Do you think It’ll come to the device in time?
Also do you think the save issues will go in time?
LikeLike
The ArkOS developer is just waiting for his unit to arrive in the mail, I have hopes that he can make some of these fundamental adjustments on his end. I’m literally just toggling settings compared to the work he can do 🙂
LikeLike
I thought I would post a follow up. A new SD card didn’t fix the save game issue. If I exit a game and turn off the system right away the recent game save and save state are wiped out. If I close a game and let it sit for a while before turning it off it seems to survive a reboot. It seems like it needs time to actually write the data to the card. Unfortunately I’ve found it too frustrating to use since the save states are unreliable. You get into a game, then it’s wiped out, nothing you can do about it. I love the form factor, and the screen looks great after the changes. It’s too bad about the game saves. If anyone has any ideas I’d be willing to try it out.
LikeLike
Save states seem to persist after shutdown. This works for me on all systems: save the state in the game you are playing, then start another rom (I simply picked the rom above or below the one I was ACTUALLY playing), THEN quit out of the game, go back to the main menu and power down. This seems to work for all games for all systems I’ve tried, and the save states do persist.
LikeLike
I think this is our most solid workaround to date, I’ve added it to the “known issues” section. Thanks for the feedback!
LikeLike
Another odd issue I’ve encountered, some large pbp files aren’t detected by the system. Specifically final fantasy 8 and fear effect 2. They simply just don’t show up when I select the playstation system. I do wonder if there is a size limit on files on the version of (what I assume is) linux?
They are scraped correctly and I know they are good quality files, they just don’t actually show up. Another mystery to investigate lol
LikeLike
Yes, I think this has to do with multi-disk PBP files, not just the file size itself.
LikeLike
Add the below setting to your core options cfg to fix the audio mix for Sega Genesis and Sega CD to sound better (at least to my ears) on the PocketGo S30’s mono speaker;
genesis_plus_gx_sound_output = “mono”
LikeLike
Hi,
Thanks for the great Lacoste, really improves the device a lot.
Is it possible to Change the button configuration in any config Files? Would love to have l2/r2 Buttons for l/r in SNES and GBA Emulator.
LikeLike
Wondering the same, as the R-button on my device is really janky! Don’t feel like taking the device apart just yet.
LikeLike
Hi!
Nice work with this handheld!
everything works fine except I had to change in the gba cfg
from input_toggle_fast_forward = “w”
to
input_toggle_fast_forward = “space”
because it acted strange when I hit the R button in game 8got a system error something like n:null when I pressed the R shoulder button ingame
LikeLike
Hi, thanks for this. I had fixed this earlier this morning but if you grabbed it last night (my time) it had that error. It should be fixed from here on out.
LikeLike
Savegame Workaround is not 100percent safe 😦
I always waited after saving until the “State saved”-text was gone, quit the game, started another rom, quit this one as well and then turned the device off.
Played a link to the past in the last 5 days, but today my savestate as well as the ingame saves are gone
Hope someone can fix this, i like the device itself very much
LikeLike
Thanks for the guide and work you have done for this.
I have a problem though. When I try to download the ‘add on pack’, I click on the ‘code’ then ‘zip’, and nothing downloads.
LikeLike
could you make a one click format news sd card and writes a new system to cards??(etc:
Win32DiskImager…)
you are guide so hard.. i don know my PocketGo S30 is what version in now…
no refer into..
LikeLike
There is a link to a fresh image near the top of the guide, here is a direct link: https://drive.google.com/file/d/1-C9SkaPAZx7EfABEA6QXyaSk4c0FynQQ/view?usp=sharing
You don’t want to flash it using Win32 Disk Imager, all you have to do is format an SD card to FAT32 and drag these contents onto the card.
LikeLiked by 1 person
The problem was solved.i love you,Thank you very much!
I think product development is hard, but keep up the good work.
LikeLike
# UPDATE WALLPAPERS: On your SD card, (remove the skins/Default folder, and remove the ‘wallpapers’ folder) ←←←←
Default folder/ “icons”folder”,”imgs”folder,”sections”folder,” font.ttf” ,”skin.conf”
all to delete this undo file?????
LikeLike
The problem was solved.Thank you very much!
save a file in folder now
LikeLike
just a warning… was using save states with tomba (PSX) because it wont let me save ingame ( known problem in emus for this game). After updating to 1.6 all my save states were gone. real bummer, lots of hours poured into the game
LikeLike
I don’t know why my previous comment was removed/deleted. However, I was finally able to get this thing working with one caveat – i’ve added Dreamcast games to the card, but when i try to open them on the system it says “This directory is empty.”
I’ve tried just leaving the files as .zip files and I’ve extracting a few. I converted the files to CHD. Nothing seems to be working. I’m wondering if anyone might have some pointers.
Thanks
LikeLike
MSU1 doesn’t work, I forgot this one use snes9x 2010, not snes9x. Thwarted 🙂 Oh well, I tried lol
LikeLiked by 1 person
I derped and must have done something I shouldn’t have and now the system won’t boot.
Does anyone have a stock image? or even better..an image with the updates (as much as is allowed) on it already?
LikeLike
Here is a fresh image, just unzip and paste into an SD card that is formatted to FAT32: https://drive.google.com/file/d/1-C9SkaPAZx7EfABEA6QXyaSk4c0FynQQ/view?usp=sharing
LikeLiked by 1 person
Life saver. Thank you muchly!
LikeLike
I follow these instruction EXACTLY but my S30 powers on then stays black.
I’m confused and after 5 hours, I think I might give up.
So annoying 😦
LikeLike
Don’t give up! I had some issues as well, but seem to have it working. Try only copying the bios required and only a few systems at a time. Are you using a Mac by chance?
LikeLike
Sorted it now. I found a download of ALL folders etc in the right places. I just added my Bios files and Roms 🙂
LikeLike
Hi Russ. Seems I cannot add roms with .chd file extensions for PlayStation, but likes the PBP file extensions. Is it possible to edit a config file?
LikeLike
Hello! Very happy with the updates. One little issue, when I start an NES game, it never launches. It looks like it’s about to, then just goes back to the games list after a moment. Is this a known issue/quick fix?
LikeLike
I’m running 1.7 of the full image that’s here: https://drive.google.com/file/d/1-C9SkaPAZx7EfABEA6QXyaSk4c0FynQQ/view?usp=sharing
LikeLike
works great thank you but settings won’t load. shutdown works fine & so do the emus. I press A (or start) to open it & get a black screen. eventually when I give up if I press B (or start) it comes back to the menu.
on a side note, I loaded up my PSX cds as CHD files before I checked the chart & saw they weren’t an option. opps
LikeLike
Anyone have any luck getting Dreamcast .chd files to work?
LikeLike
i can’t get Dreamcast games to work at all.
this thing is garbage. it’s crashed on me 3 times in 2 weeks causing me to lose saved games and have to reconfigure the entire system. i just got done transferring games again and turned it on only to find I don’t have the Shutdown option so i’ll have to do it again. i don’t know how much time i’ve wasted on this thing.
when the price on RetroMimi goes back up to $90 i may sell it and try to recoup my money.
LikeLiked by 1 person
I had the same problem but downloaded an ‘all in one’ pack. Every file and folder is in it’s proper place. All you do is drag your games to the SD card. It works great now.
LikeLike
What a load of rubbish Scraper is !!
It took me ages following the instructions, it downloaded 162 out of 4079 covers, then tells me I NEED an account.
Signed up but it won’t recognise me.
Waste of time 😦
LikeLike
Gotta agree to disagree there. I can’t think of a program that’s helped me more with my retro games. I usually hit my daily cap of 50,000 scrapes two or three days a week lol. I do support them though and considering how much their service is being used lately they might not be the best option if you are going the free route, they DO prioritize supporters from what I remember?
LikeLiked by 1 person
This is just from my experience. The problem is, I have actually signed up but it just won’t let me log in.
If I can get it to do the job I will consider donating, but as it is now, nope lol.
LikeLike
You’ll have to report back when/if it lets you actually log in!
I seem to remember new accounts may take a day or two to show up? Are you having problems with the skraper software itself or screenscraper.fr? Screenscraper has been getting hammered with users lately so it may have locked itself down to supporters or registered users only mode again (which may be the whole problem, especially if you said it isn’t recognizing your new account?). I would give it a bit and be patient if you can!
I don’t think there are any other working scrapers with a windows GUI front end that work currently, and most if not all use screenscraper’s database. Emumovies has a scraper but would require a ton more work since the output appears to be meant for launchbox and you would need to set up your own gamelists… There are a couple different command line only ones that are retropie oriented that I can’t really speak to on a desktop PC
I DO know skraper is working however, I literally just used it yesterday and scraped like 9500 games
LikeLiked by 1 person
Will do. Scraper itself is fine. Everything works, but it says I need an acount. Signed up twice with differenr emails and names etc, but nope. I just can’t log in.
LikeLike
So I recently got my s30. I am backing up the files and its almost 14gb. The from the looks of the files being transfered, it has a ton more games then what is being shown when I used the system.
LikeLike
never mind just image files for future game installs.
LikeLiked by 1 person
Need help figuring out an issue. Mine is stuck on no micro sd card. Ive formatte dboth the standard and a 128 gb one, saved the original files on the original sd card and even added the new files to it and still nothing
LikeLike
You’re sure you formatted it to FAT32?
LikeLike
Ugh, I just assumed the PocketGo S30 had a sleep mode when I bought it. Really disappointed, this thing seemed like the perfect handheld…
Is there anything out there that flawlessly emulates all the 8- and 16-bit consoles, supports save states, AND has a sleep mode?
FYI, I owned a GPD XD before this, but the build quality is just too unreliable for the price…
LikeLike
Just got the PocketGo S30. Waited quite a long time to get it and it will not turn on or even indicate that is charging. Very annoying. Their customer service is talking forever to respond.
LikeLike
Regarding Mame games, when i have 4 players option, how can i “insert coin” in a different character?
LikeLike
I would recommend you use the two player version of the roms instead, so you can choose the player. They are often labeled as “2pj” — xmen2pj, tmnt2pj, etc.
LikeLike
Thanks,
it worked with TMNT but im having issues with The Simpsons (2 Players World, set 1), why is there “sets” in separated ROMS, should i merge them together ?
LikeLike
Go for the unmerged romset, each file will work independently of the other.
LikeLike
The Simpsons file you’re looking for is named “simps2pj.zip”
LikeLike
Is there button remapping for each emulator? How can I reassign A, B. X, Y etc?
LikeLike
Are the BIOS files required to boot the device? I ended up formatting the SD Card before making a backup, so I don’t have the original BIOS files anymore. Now my S30 gets stuck in the logo screen and I can’t get it to work. It works with the newer SIMPLE30, but I prefer this previous version because the in-game menu is easier to use than RetroArch. Can anyone help me? This emulation setup is actually hard for me, I just want to make the device work again.
LikeLike
Has anyone found a replacement battery for the pocketgo s30? My battery is starting to bloat and the case is popping open.
LikeLike
I would like to duplicate the create “custom collections” folders in the ROMs folder and use a config file to point the firmware as to which emulator to use for which rom in the folder. I want to do like a batman “console” which features all the batman games. Is this possible with Simple30?
If not possible, is it possible to have multiple SNES folders and than use different wallpaper png files to “label” each SNES folder with a genre or group name. Like put all the Marvel super hero SNES games in a single snes duplicated folder and set the whole folder to 1 emulator core?
LikeLike
I’m having the same problem, but I did the back up and I’m still having problems. The BIOS are there yet, I cant get anywhere past the logo screen. Did you have any luck?
LikeLike
So I followed the instructions to a T, (downloaded new add on pack, formatted the new SD card, moved ROMS into correct folders) however, when turning on, it only goes to the Pocket GO title screen and no other screens. Not sure what I’m doing wrong?
LikeLike
My analog stick for DC games doesn’t work. Besise, on MAME2010 core, the analogs’ up + left and up + right doesn’t work. Is there a fix to solve these problem? Thank you in advance!!!
LikeLike
Anyone can help me? How can I config FinalBurn Neo Controls/Buttons? Thanks!
LikeLike
Hi guys!do we have hotkeys (or tips) to increase/decrease the backlight during a game please?
thanks
LikeLike
Is it possible to add cover art without scraper or XML file?
LikeLike
I went to retroarch Menu and I guess I did something wrong, I can’t go back to the retroarch menu or play any games, it’s just black screen for 5 seconds and doesn’t play when I t see y playing a game or click on the retroarch logo…
LikeLike
Someone told me I accidentally malfunctioned it just need to put in a laptop or and decrypt it, It’ll identify as error and ask me to fix it?
LikeLike
Strange how my comments keep being deleted.
LikeLike
Alguém sabe como deixar uma escala padrão nos emuladores? sempre que configuro uma a que e 3:2 o retroarc nunca aceita, sempre fica como core provide.
Alguém sabe como corrige isso e deixa a que eu configurei?
LikeLike